P-660HW-Tx v3 Series 802.11g Wireless ADSL2+ 4-port Gateway Default Login Details IP Address http://192.168.1.1 Admin Password 1234 User Password user Firmware Version 3.70 Editionwww.zyxel.com 2, 10/2010 www.zyxel.
About This User's Guide About This User's Guide Intended Audience This manual is intended for people who want to configure the ZyXEL Device using the web configurator. You should have at least a basic knowledge of TCP/IP networking concepts and topology. Related Documentation • Quick Start Guide The Quick Start Guide is designed to help you get up and running right away. It contains information on setting up your network and configuring for Internet access.
About This User's Guide Customer Support In the event of problems that cannot be solved by using this manual, you should contact your vendor. If you cannot contact your vendor, then contact a ZyXEL office for the region in which you bought the device. See http://www.zyxel.com/ web/contact_us.php for contact information. Please have the following information ready when you contact an office. • Product model and serial number. • Warranty Information. • Date that you received your device.
Document Conventions Document Conventions Warnings and Notes These are how warnings and notes are shown in this User’s Guide. Warnings tell you about things that could harm you or your device. Note: Notes tell you other important information (for example, other things you may need to configure or helpful tips) or recommendations. Syntax Conventions • The P-660HW-Tx v3 may be referred to as the “ZyXEL Device”, the “device”, the “system” or the “product” in this User’s Guide.
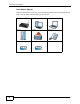
Document Conventions Icons Used in Figures Figures in this User’s Guide may use the following generic icons. The ZyXEL Device icon is not an exact representation of your device.
Safety Warnings Safety Warnings • Do NOT use this product near water, for example, in a wet basement or near a swimming pool. • Do NOT expose your device to dampness, dust or corrosive liquids. • Do NOT store things on the device. • Do NOT install, use, or service this device during a thunderstorm. There is a remote risk of electric shock from lightning. • Connect ONLY suitable accessories to the device. • Do NOT open the device or unit.
Safety Warnings 8 P-660HW-Tx v3 Series User’s Guide
Contents Overview Contents Overview Introduction ............................................................................................................................ 21 Introducing the ZyXEL Device ................................................................................................... 23 Introducing the Web Configurator .............................................................................................. 29 Status Screens ........................................................
Contents Overview Product Specifications ............................................................................................................. 341 Appendices and Index .........................................................................................................
Table of Contents Table of Contents About This User's Guide .......................................................................................................... 3 Document Conventions............................................................................................................ 5 Safety Warnings........................................................................................................................ 7 Contents Overview .......................................................
Table of Contents 3.1 Overview .............................................................................................................................. 35 3.2 The Status Screen ............................................................................................................... 35 3.3 Client List ............................................................................................................................. 38 3.4 WLAN Status ....................................................
Table of Contents 5.3 Wireless Connection Wizard Setup ..................................................................................... 92 5.3.1 Manually Assign a WPA-PSK key .............................................................................. 94 5.3.2 Manually Assign a WEP Key ...................................................................................... 95 Part III: Network......................................................................................
Table of Contents 7.6.2 DHCP Setup ............................................................................................................. 130 7.6.3 DNS Server Addresses ............................................................................................ 130 7.6.4 LAN TCP/IP .............................................................................................................. 131 7.6.5 RIP Setup ..........................................................................................
Table of Contents 9.3.1 Configuring the Port Forwarding Screen .................................................................. 175 9.3.2 The Port Forwarding Rule Edit Screen .................................................................... 177 9.4 The Address Mapping Screen ........................................................................................... 178 9.4.1 The Address Mapping Rule Edit Screen .................................................................. 179 9.
Table of Contents 11.2 The Keyword Screen ...................................................................................................... 214 11.3 The Schedule Screen ..................................................................................................... 215 11.4 The Trusted Screen ........................................................................................................ 216 Chapter 12 Packet Filter.........................................................................
Table of Contents 15.1 Overview .......................................................................................................................... 243 15.1.1 What You Can Do in the 802.1Q/1P Screens ........................................................ 243 15.1.2 What You Need to Know About 802.1Q/1P ........................................................... 243 15.1.3 802.1Q/1P Example ............................................................................................... 245 15.
Table of Contents Chapter 19 Universal Plug-and-Play (UPnP).......................................................................................... 281 19.1 Overview .......................................................................................................................... 281 19.1.1 What You Can Do in the UPnP Screen .................................................................. 281 19.1.2 What You Need to Know About UPnP ...............................................................
Table of Contents Chapter 23 Diagnostic.............................................................................................................................. 329 23.1 Overview .......................................................................................................................... 329 23.1.1 What You Can Do in the Diagnostic Screens ......................................................... 329 23.2 The General Diagnostic Screen ......................................................
Table of Contents 20 P-660HW-Tx v3 Series User’s Guide
P ART I Introduction Introducing the ZyXEL Device (23) Introducing the Web Configurator (29) Status Screens (35) Tutorials (43) 21
CHAPTER 1 Introducing the ZyXEL Device This chapter introduces the main applications and features of the ZyXEL Device. It also introduces the ways you can manage the ZyXEL Device. 1.1 Overview The P-660HW-Tx v3 is an ADSL2+ router. By integrating DSL and NAT, you are provided with ease of installation and high-speed, shared Internet access. The P660HW-Tx v3 is also a complete security solution with a robust firewall and content filtering.
Chapter 1 Introducing the ZyXEL Device • FTP for firmware upgrades and configuration backup/restore. • TR-069. This is an auto-configuration server used to remotely configure your device. 1.3 Good Habits for Managing the ZyXEL Device Do the following things regularly to make the ZyXEL Device more secure and to manage the ZyXEL Device more effectively. • Change the password. Use a password that’s not easy to guess and that consists of different types of characters, such as numbers and letters.
Chapter 1 Introducing the ZyXEL Device 1.4.1 Internet Access Your ZyXEL Device provides shared Internet access by connecting the DSL port to the DSL or MODEM jack on a splitter or your telephone jack. Computers can connect to the ZyXEL Device’s LAN ports (or wirelessly). Figure 1 ZyXEL Device’s Router Features LAN DSL You can also configure firewall and content filtering on the ZyXEL Device for secure Internet access.
Chapter 1 Introducing the ZyXEL Device 1.5 LEDs (Lights) The following graphic displays the labels of the LEDs. Figure 2 LEDs on the Top of the Device None of the LEDs are on if the ZyXEL Device is not receiving power. Table 1 LED Descriptions LED COLO R STATUS DESCRIPTION POWER Green On The ZyXEL Device is receiving power and ready for use. Blinking The ZyXEL Device is self-testing. On The ZyXEL Device detected an error while self-testing, or there is a device malfunction.
Chapter 1 Introducing the ZyXEL Device Table 1 LED Descriptions LED COLO R STATUS DESCRIPTION INTERNET Green On The ZyXEL Device has an IP connection but no traffic. Your device has a WAN IP address (either static or assigned by a DHCP server), PPP negotiation was successfully completed (if used) and the DSL connection is up. Red Blinking The ZyXEL Device is sending or receiving IP traffic. On The ZyXEL Device attempted to make an IP connection but failed.
Chapter 1 Introducing the ZyXEL Device 1.7.1 Turn the Wireless LAN Off or On 1 Make sure the POWER LED is on (not blinking). 2 Press the WPS WLAN ON/OFF button for less than five seconds and release it. The WLAN/WPS LED should change from on to off or vice versa. 1.7.2 Activate WPS 1 Make sure the POWER LED is on (not blinking). 2 Press the WPS WLAN ON/OFF button for five to ten seconds and release it. Press the WPS button on another WPS-enabled device within range of the ZyXEL Device.
CHAPTER 2 Introducing the Web Configurator 2.1 Overview The web configurator is an HTML-based management interface that allows easy device setup and management via Internet browser. Use Internet Explorer 6.0 and later or Netscape Navigator 7.0 and later versions. The recommended screen resolution is 1024 by 768 pixels. In order to use the web configurator you need to allow: • Web browser pop-up windows from your device. Web pop-up blocking is enabled by default in Windows XP SP (Service Pack) 2.
Chapter 2 Introducing the Web Configurator ZyXEL Device, type the admin password (1234 by default) in the password screen and click Login. Click Cancel to revert to the default user password in the password field. If you have changed the password, enter your password and click Login. Figure 3 Password Screen 5 The following screen displays if you have not yet changed your password. It is strongly recommended you change the default password.
Chapter 2 Introducing the Web Configurator 6 Select Go to Wizard setup and click Apply to display the wizard main screen. Otherwise, select Go to Advanced setup and click Apply to display the Status screen. Figure 5 Replace Factory Default Certificate Screen Note: For security reasons, the ZyXEL Device automatically logs you out if you do not use the web configurator for five minutes (default). If this happens, log in again. 2.
Chapter 2 Introducing the Web Configurator As illustrated above, the main screen is divided into these parts: • A - title bar • B - navigation panel • C - main window • D - status bar 2.2.1 Title Bar The title bar provides some icons in the upper right corner. The icons provide the following functions. Table 2 Web Configurator Icons in the Title Bar ICON DESCRIPTION Wizards: Click this icon to go to the configuration wizards. See Chapter 5 on page 83 for more information.
Chapter 2 Introducing the Web Configurator Table 3 Navigation Panel Summary LINK Wireless LAN NAT TAB FUNCTION AP Use this screen to configure the wireless LAN settings and WLAN authentication/security settings. More AP Use this screen to configure multiple BSSs on the ZyXEL Device. WPS Use this screen to configure WPS (Wi-Fi Protected Setup) settings. WPS Station Use this screen to set up a WPS wireless network.
Chapter 2 Introducing the Web Configurator Table 3 Navigation Panel Summary LINK Remote MGMT UPnP TAB FUNCTION WWW Use this screen to configure through which interface(s) and from which IP address(es) users can use HTTP to manage the ZyXEL Device. Telnet Use this screen to configure through which interface(s) and from which IP address(es) users can use Telnet to manage the ZyXEL Device.
CHAPTER 3 Status Screens 3.1 Overview Use the Status screens to look at the current status of the device, system resources, and interfaces (LAN and WAN). The Status screen also provides detailed information from Any IP and DHCP and statistics from bandwidth management, and traffic. 3.2 The Status Screen Use this screen to view the status of the ZyXEL Device. Click Status to open this screen.
Chapter 3 Status Screens Each field is described in the following table. Table 4 Status Screen LABEL DESCRIPTION Refresh Interval Select how often you want the ZyXEL Device to update this screen. Apply Click this to update this screen immediately. Device Information Host Name This field displays the ZyXEL Device system name. It is used for identification. You can change this in the Maintenance > System > General screen’s System Name field. Model Number This is the model name of your device.
Chapter 3 Status Screens Table 4 Status Screen LABEL DESCRIPTION WLAN Information SSID This is the descriptive name used to identify the ZyXEL Device in a wireless LAN. Click this to go to the screen where you can change it. Channel This is the channel number used by the ZyXEL Device now. Security This displays the type of security mode the ZyXEL Device is using in the wireless LAN. WPS This displays whether WPS is activated. Click this to go to the screen where you can configure the settings.
Chapter 3 Status Screens Table 4 Status Screen LABEL DESCRIPTION Status This field indicates whether or not the ZyXEL Device is using the interface. For the DSL interface, this field displays Down (line is down), Up (line is up or connected) if you're using Ethernet encapsulation and Down (line is down), Up (line is up or connected), Idle (line (ppp) idle), Dial (starting to trigger a call) and Drop (dropping a call) if you're using PPPoE encapsulation.
Chapter 3 Status Screens 3.4 WLAN Status Use this screen to view the wireless stations that are currently associated to the ZyXEL Device. Click Status > WLAN Status to access this screen. Figure 8 WLAN Status The following table describes the labels in this screen. Table 5 WLAN Status LABEL DESCRIPTION # This is the index number of an associated wireless station. MAC Address This field displays the MAC (Media Access Control) address of an associated wireless station.
Chapter 3 Status Screens Each field is described in the following table. Table 6 Any IP Table LABEL DESCRIPTION # This field is a sequential value. It is not associated with a specific entry. IP Address This field displays the IP address of each computer that is using the ZyXEL Device but is in a different subnet than the ZyXEL Device. MAC Address This field displays the MAC address of the computer that is using the ZyXEL Device but is in a different subnet than the ZyXEL Device.
Chapter 3 Status Screens The following table describes the fields in this screen. Table 7 Packet Statistics LABEL DESCRIPTION System Monitor System up Time This is the elapsed time the system has been up. Current Date/ Time This field displays your ZyXEL Device’s present date and time. CPU Usage This field specifies the percentage of CPU utilization. Memory Usage This field specifies the percentage of memory utilization. WAN Port Statistics Link Status This is the status of your WAN link.
Chapter 3 Status Screens 42 P-660HW-Tx v3 Series User’s Guide
CHAPTER 4 Tutorials 4.1 Overview This chapter shows you how to use the ZyXEL Device’s various features.
Chapter 4 Tutorials 4.2.1 Configuring the Wireless Network Settings This example uses the following parameters to set up a wireless network. 1 44 SSID Example Security Mode WPA-PSK Pre-Shared Key DoNotStealMyWirelessNetwork 802.11 Mode Mixed Click Network > Wireless LAN to open the AP screen. Configure the screen using the provided parameters (see page 44). Click Apply.
Chapter 4 Tutorials 2 Click the Advanced Setup button and select Mixed in the 802.11 Mode field. Click Apply. Thomas can now use the WPS feature to establish a wireless connection between his notebook and the ZyXEL Device (see Section 4.2.2 on page 45). He can also use the notebook’s wireless client to search for the ZyXEL Device (see Section 4.2.3 on page 50). 4.2.2 Using WPS This section shows you how to set up a wireless network using WPS.
Chapter 4 Tutorials 3 In the wireless client utility, go to the WPS setting page. Enable WPS and press the WPS button (Start or WPS button) 4 Push and hold the WPS button located on the ZyXEL Device’s rear panel for more than 5 seconds. Alternatively, you may log into ZyXEL Device’s web configurator and click the Push Button in the Network > Wireless LAN > WPS Station screen. Note: Your ZyXEL Device has a WPS button located on its rear panel as well as a WPS button in its configuration utility.
Chapter 4 Tutorials The following figure shows you an example of how to set up a wireless network and its security by pressing a button on both ZyXEL Device and wireless client.
Chapter 4 Tutorials PIN Configuration When you use the PIN configuration method, you need to use both the ZyXEL Device’s web configurator and the wireless client’s utility. 1 Launch your wireless client’s configuration utility. Go to the WPS settings and select the PIN method to get a PIN number. 2 Enter the PIN number in the PIN field in the Network > Wireless LAN > WPS Station screen on the ZyXEL Device.
Chapter 4 Tutorials The following figure shows you how to set up a wireless network and its security on a ZyXEL Device and a wireless client by using PIN method.
Chapter 4 Tutorials 4.2.3 Without WPS Use the wireless adapter’s utility installed on the notebook to search for the “Example” SSID. Then enter the “DoNotStealMyWirelessNetwork” pre-shared key to establish an wireless Internet connection. Note: The ZyXEL Device supports IEEE 802.11b and IEEE 802.11g wireless clients. Make sure that your notebook or computer’s wireless adapter supports one of these standards. 4.2.
Chapter 4 Tutorials 2 Configure the screen as follows. Turn on the wireless network from Mondays to Fridays between 18:00 and 23:30. Turn on the wireless network all day on Saturdays and Sundays. Click Apply.
Chapter 4 Tutorials 4.3 Setting Up Multiple Wireless Groups Company A wants to create different wireless network groups for different types of users as shown in the following figure. Each group has its own SSID, security mode and QoS control. Company Guest VIP • Employees in Company A will use a general Company wireless network group. • Higher management level and important visitors will use the VIP group, which has the highest QoS control.
Chapter 4 Tutorials 1 Click Network > Wireless LAN to open the AP screen. Use this screen to set up the company’s general wireless network group. Configure the screen using the provided parameters and click Apply. 2 Click Network > Wireless LAN > More AP to open the following screen. Click the Edit icon to configure the second wireless network group.
Chapter 4 Tutorials 54 3 Configure the screen using the provided parameters and click Apply. 4 In the More AP screen, click the Edit icon to configure the third wireless network group.
Chapter 4 Tutorials 5 Configure the screen using the provided parameters and click Apply. 6 Activate the wireless network groups and click Apply.
Chapter 4 Tutorials 4.4 Configuring the MAC Address Filter Thomas noticed that his daughter Josephine spends too much time surfing the web and downloading media files. He decided to prevent Josephine from accessing the Internet so that she can concentrate on preparing for her final exams. Josephine’s computer connects wirelessly to the Internet through the ZyXEL Device. Thomas can deny access to the wireless network using the MAC address of Josephine’s computer.
Chapter 4 Tutorials 2 Click Network > Wireless LAN to open the AP screen. Click the Edit button in the MAC Filter field. 3 Select Active MAC Filter and Deny Filter Action. Enter the MAC address you found in the Client List screen. Click Apply. Josephine will no longer be able to access the Internet through the ZyXEL Device.
Chapter 4 Tutorials 4.5 Setting Up NAT Port Forwarding Thomas recently received an Xbox 360 as his birthday gift. His friends invited him to play online games with them on Xbox LIVE. In order to communicate and play with other gamers on Xbox LIVE, Thomas needs to configure the port settings on his ZyXEL Device. Xbox 360 requires the following ports to be available in order to operate Xbox LIVE correctly: TCP: 53, 80, 3074 UDP: 53, 88, 3074 Thomas may set up the port settings in two ways.
Chapter 4 Tutorials 2 Click Network > NAT to open the General screen. Select Active Network Address Translation and SUA Only. Click Apply. 3 Click Network > NAT to open the General screen. Enter the Xbox 360’s IP address in the Default Server field. Click Apply. 4.5.2 Port Forwarding If the default server is already assigned to another server, configure the ports for Xbox 360. 1 Click Network > NAT to open the General screen. Select Active Network Address Translation and SUA Only. Click Apply.
Chapter 4 Tutorials 60 2 Click Network > NAT > Port Forwarding to open the following screen. Select User define from the Service Name field. 3 Configure the screen as follows to open TCP/UDP port 53 for Xbox 360. Click Apply. 4 Repeat steps 2 and 3 to open the rest of the ports for Xbox 360. The port forwarding settings you configured are listed in the Port Forwarding screen.
Chapter 4 Tutorials Thomas can then connect his Xbox 360 to the Internet and play online games with his friends. In this tutorial, all port 80 traffic is forwarded to Xbox 360, but port 80 is also the default listening port for remote management via WWW. If Thomas also wants to manage the ZyXEL Device from the Internet, he has to assign an unused port to WWW remote access. Click Advanced > Remote MGMT to open the WWW screen. Enter an unused port in the Port field (this example uses 81). Click Apply. 4.
Chapter 4 Tutorials • Adding a Firewall Rule for Remote Management • Testing the DDNS Setting Note: If you have a private WAN IP address, then you cannot use DDNS. 4.6.1 Registering a DDNS Account on www.dyndns.org 1 Open a browser and type http://www.dyndns.org. 2 Apply for a user account. This tutorial uses UserName1 and 12345 as the username and password. 3 Log into www.dyndns.org using your account. 4 Add a new DDNS host name. This tutorial uses the following settings as an example.
Chapter 4 Tutorials 2e Select Use WAN IP Address for the IP address update policy. 2f Click Apply. 4.6.3 Adding a Firewall Rule for Remote Management By default, your ZyXEL Device firewall is enabled to secure your network from attacks. In this tutorial, you add a firewall rule that lets you manage the ZyXEL Device from the Internet. 1 Click Security > Firewall and select Rules. 2 Select WAN to WAN / Router and select the number of the last rule that has been configured on this screen. Click Add.
Chapter 4 Tutorials 3c In the Source Address section, select Single Address and enter the IP address of the computer that you allow to access the ZyXEL Device from the Internet. Click Add. Select Any in the Source Address List and click Delete. Note: If the computer gets a different IP address, this firewall rule will not work. 3d In the Service section, select HTTP(TCP:80) in the Available Services field and click Add. Select Any(UDP) and Any(TCP) and click Remove oneby-one to not include them. a.b.c.
Chapter 4 Tutorials 3 The ZyXEL Device’s login page should appear. You can then log into the ZyXEL Device and manage it. 4.7 Configuring Static Route for Routing to Another Network In order to extend your Intranet and control traffic flowing directions, you may connect a router to the ZyXEL Device’s LAN. The router may be used to separate two department networks. This tutorial shows how to configure a static routing rule for two network routings.
Chapter 4 Tutorials You need to specify a static routing rule on the ZyXEL Device to specify R as the router in charge of forwarding traffic to N2. In this case, the ZyXEL Device routes traffic from A to R and then R routes the traffic to B. N1 A R N2 B This tutorial uses the following example IP settings: Table 8 IP Settings in this Tutorial DEVICE / COMPUTER IP ADDRESS The ZyXEL Device’s WAN 172.16.1.1 The ZyXEL Device’s LAN 192.168.1.1 A 192.168.1.34 R’s N1 192.168.1.253 R’s N2 192.168.
Chapter 4 Tutorials 4 Configure the Static Route Setup screen using the following settings: 4a Select Active. 4b Specify a descriptive name for this routing rule. 4c Type 192.168.10.0 and subnet mask 255.255.255.0 for the destination, N2. 4d Select Gateway Address for the gateway type. 4e Type 192.168.1.253 (R’s N1 address) in the Gateway IP Address field. 4a Click Apply. Now B should be able to receive traffic from A.
Chapter 4 Tutorials This tutorial uses the following example settings: Table 9 IP Settings in this Tutorial DEVICE / COMPUTER IP ADDRESS The ZyXEL Device’s WAN 172.16.1.253 (IP-1) 172.16.1.254 (IP-2) The ZyXEL Device’s LAN 192.168.1.1 A 192.168.1.2 B 192.168.1.3 C a.b.c.d To do this, you can use either of the following settings: • Full Feature NAT with many-to-many no overload mapping • Full Feature NAT with one-to-one mapping 4.8.
Chapter 4 Tutorials 2 Select Active Network Address Translation(NAT) and Full Feature in the General screen. Click Apply. 3 Click the Address Mapping tab, and then click the Edit icon on a new rule. 4 Configure the rule using the following settings: • Type: Many-to-Many No Overload • Local IP addresses: 192.168.1.2 ~ 192.168.1.3 • Global IP addresses: 172.16.1.253 ~ 172.16.1.254 Then click Apply.
Chapter 4 Tutorials 4.8.2 Full Feature NAT + One-to-One Mapping Use this setting if your applications must use fixed public IP addresses and the applications can be initiated either from the Intranet computers (A and B) or the Internet computer (C). For example, gaming application. IP-1 A C B To configure this setting: 1 Click Network > NAT. 2 Select Active Network Address Translation(NAT) and Full Feature in the General screen. Click Apply.
Chapter 4 Tutorials • Rule 2 (This maps the public IP address 172.16.1.254 to the private IP address 192.168.1.3) Type: One-to-One Local Start IP: 192.168.1.3 Global Start IP: 172.16.1.254 Click Apply on each of the screens. 4.9 Multiple WAN Connections Example This example shows an application for multiple WAN connections. Your ISP may configure more than one WAN connection on the ZyXEL Device to record traffic statistics or calculate service charges.
Chapter 4 Tutorials • The connection with VPI/VCI, 0/35, is dedicated for general data transmission. Figure 11 Example for Multiple WAN Connections 4.10 Multiple PVCs with QoS This tutorial is only applicable for an ISP engineer. An ISP may configure multiple PVCs for seperating different subscriber application traffic. This helps to record traffic statistics or calculate service charges.
Chapter 4 Tutorials 4.10.1 Configuring Multiple PVCs and ATM-QoS This section shows you how to configure two PVCs and specify a proper ATM-QoS type for each PVC. 1 Click Network > WAN > Internet Access Setup, configure the settings you (ISP) want to provide to the subscriber for general data transmission.
Chapter 4 Tutorials 2 Click the Advanced Setup button to display the following options. Select UBR in the ATM QoS Type field. Click Apply. 3 Click the More Connections tab and then click the Edit icon next to the entry two. 4 Then configure the screen using the following example settings: • Select Active.
Chapter 4 Tutorials • PVC: LLC, 0/33 Click Apply. 5 Click the Advanced Setup button and then select CBR in the ATM QoS Type field. Click Apply.
Chapter 4 Tutorials 4.10.2 Configuring Traffic Classifiers This section shows you how to map different port traffic to the different outgoing PVCs that the traffic should go. In this tutorial, voice traffic sent from port 4 should be transmitted to PVC PVC-for-VoIP with WAN index 2. General data traffic sent from port 1~3 should be transmitted to PVC Internet Connection with WAN index 1. 1 Click Advanced > QoS > Class Setup and then click Add.
Chapter 4 Tutorials Click Apply.
Chapter 4 Tutorials 3 The Class Setup screen appears. Click Add to create another QoS classifier rule for general data. 4 Configure this rule using the following example settings. • Class Configuration: • Select Active. • Enter a descriptive name for this rule. For example, General Data.
Chapter 4 Tutorials • Physical Port: 1~3 (means to exclude port 4) Click Apply.
Chapter 4 Tutorials 5 Click the General tab. Then select Active QoS and click Apply. Now you can connect a VoIP phone to the ZyXEL Device’s LAN port 4 and computers to port 1~3. The ZyXEL Device classifies and prioritizes voice traffic to optimize voice quality.
P ART II Wizard Internet and Wireless Setup Wizard (83) 81
CHAPTER 5 Internet and Wireless Setup Wizard 5.1 Overview Use the wizard setup screens to configure your system for Internet access with the information given to you by your ISP. Note: See the advanced menu chapters for background information on these fields. 5.2 Internet Access Wizard Setup 1 After you enter the password to access the web configurator, select Go to Wizard setup and click Apply. Otherwise, click the wizard icon ( ) in the top right corner of the web configurator to go to the wizards.
Chapter 5 Internet and Wireless Setup Wizard 2 Click INTERNET/WIRELESS SETUP to configure the system for Internet access and wireless connection. Figure 13 Wizard Welcome 3 Your ZyXEL device attempts to detect your DSL connection and your connection type. 3a The following screen appears if a connection is not detected. Check your hardware connections and click Restart the INTERNET/WIRELESS SETUP Wizard to return to the wizard welcome screen.
Chapter 5 Internet and Wireless Setup Wizard 3b The following screen displays if a PPPoE or PPPoA connection is detected. Enter your Internet account information (username, password and/or service name) exactly as provided by your ISP. Then click Next and see Section 5.3 on page 92 for wireless connection wizard setup. Figure 15 Auto-Detection: PPPoE 3c The following screen appears if the ZyXEL device detects a connection but not the connection type. Click Next and refer to Section 5.2.
Chapter 5 Internet and Wireless Setup Wizard 5.2.1 Manual Configuration 1 If the ZyXEL Device fails to detect your DSL connection type but the physical line is connected, enter your Internet access information in the wizard screen exactly as your service provider gave it to you. Leave the defaults in any fields for which you were not given information. Figure 17 Internet Access Wizard Setup: ISP Parameters The following table describes the fields in this screen.
Chapter 5 Internet and Wireless Setup Wizard Table 10 Internet Access Wizard Setup: ISP Parameters 2 LABEL DESCRIPTION Multiplexing Select the multiplexing method used by your ISP from the Multiplex drop-down list box either VC-based or LLC-based. Virtual Circuit ID VPI (Virtual Path Identifier) and VCI (Virtual Channel Identifier) define a virtual circuit. Refer to the appendix for more information. VPI Enter the VPI assigned to you. This field may already be configured.
Chapter 5 Internet and Wireless Setup Wizard The following table describes the fields in this screen. Table 11 LABEL DESCRIPTION User Name Enter the user name exactly as your ISP assigned. If assigned a name in the form user@domain where domain identifies a service name, then enter both components exactly as given. Password Enter the password associated with the user name above. Service Name Type the name of your PPPoE service here. Back Click this to return to the previous screen without saving.
Chapter 5 Internet and Wireless Setup Wizard The following table describes the fields in this screen. Table 12 Internet Connection with RFC 1483 LABEL DESCRIPTION IP Address This field is available if you select Routing in the Mode field. Type your ISP assigned IP address in this field. Back Click this to return to the previous screen without saving. Next Click this to continue to the next wizard screen. Exit Click this to close the wizard screen without saving.
Chapter 5 Internet and Wireless Setup Wizard The following table describes the fields in this screen. Table 13 Internet Connection with ENET ENCAP LABEL DESCRIPTION Obtain an IP A static IP address is a fixed IP that your ISP gives you. A dynamic IP Address address is not fixed; the ISP assigns you a different one each time you Automatically connect to the Internet. Select Obtain an IP Address Automatically if you have a dynamic IP address.
Chapter 5 Internet and Wireless Setup Wizard The following table describes the fields in this screen. Table 14 Internet Connection with PPPoA LABEL DESCRIPTION User Name Enter the login name that your ISP gives you. Password Enter the password associated with the user name above. Back Click this to return to the previous screen without saving. Apply Click this to save your changes. Exit Click this to close the wizard screen without saving.
Chapter 5 Internet and Wireless Setup Wizard 5.3 Wireless Connection Wizard Setup After you configure the Internet access information, use the following screens to set up your wireless LAN. 1 Select Yes and click Next to configure wireless settings. Otherwise, select No and skip to Step 6. Figure 24 Connection Test Successful 2 Use this screen to activate the wireless LAN. Click Next to continue. Figure 25 Wireless LAN Setup Wizard 1 The following table describes the labels in this screen.
Chapter 5 Internet and Wireless Setup Wizard Table 15 Wireless LAN Setup Wizard 1 3 LABEL DESCRIPTION Next Click this to continue to the next wizard screen. Exit Click this to close the wizard screen without saving. Configure your wireless settings in this screen. Click Next. Figure 26 Wireless LAN The following table describes the labels in this screen.
Chapter 5 Internet and Wireless Setup Wizard Table 16 Wireless LAN Setup Wizard 2 LABEL DESCRIPTION Next Click this to continue to the next wizard screen. Exit Click this to close the wizard screen without saving. Note: The wireless stations and ZyXEL Device must use the same SSID, channel ID and WEP encryption key (if WEP is enabled), WPA-PSK (if WPA-PSK is enabled) for wireless communication. 4 This screen varies depending on the security mode you selected in the previous screen.
Chapter 5 Internet and Wireless Setup Wizard 5.3.2 Manually Assign a WEP Key Choose Manually assign a WEP key to setup WEP Encryption parameters. Figure 28 Manually Assign a WEP key The following table describes the labels in this screen. Table 18 Manually Assign a WEP key LABEL DESCRIPTION Key The WEP keys are used to encrypt data. Both the ZyXEL Device and the wireless stations must use the same WEP key for data transmission.
Chapter 5 Internet and Wireless Setup Wizard 6 Use the read-only summary table to check whether what you have configured is correct. Click Finish to complete and save the wizard setup. Note: No wireless LAN settings display if you chose not to configure wireless LAN settings. Figure 30 Internet Access and WLAN Wizard Setup Complete 7 96 Launch your web browser and navigate to www.zyxel.com. Internet access is just the beginning.
P ART III Network WAN Setup (99) LAN Setup (119) Wireless LAN (137) Network Address Translation (NAT) (171) 97
CHAPTER 6 WAN Setup 6.1 Overview This chapter describes how to configure WAN settings from the WAN screens. Use these screens to configure your ZyXEL Device for Internet access. A WAN (Wide Area Network) connection is an outside connection to another network or the Internet. It connects your private networks (such as a LAN (Local Area Network) and other networks, so that a computer in one location can communicate with computers in other locations. Figure 31 LAN and WAN LAN WAN 6.1.
Chapter 6 WAN Setup they should also provide a username and password (and service name) for user authentication. WAN IP Address The WAN IP address is an IP address for the ZyXEL Device, which makes it accessible from an outside network. It is used by the ZyXEL Device to communicate with other devices in other networks. It can be static (fixed) or dynamically assigned by the ISP each time the ZyXEL Device tries to access the Internet.
Chapter 6 WAN Setup 6.2 The Internet Access Setup Screen Use this screen to change your ZyXEL Device’s WAN settings. Click Network > WAN > Internet Access Setup. The screen differs by the WAN type and encapsulation you select.
Chapter 6 WAN Setup The following table describes the labels in this screen. Table 19 Network > WAN > Internet Access Setup LABEL DESCRIPTION Line Modulation Select the modulation supported by your ISP. Use Multi Mode if you are not sure which mode to choose from. The ZyXEL Device dynamically diagnoses the mode supported by the ISP and selects the best compatible one for your connection. Other options are ADSL G.dmt, ADSL2, ADSL2+, ADSL2 AnnexM, ADSL2+ AnnexM, READSL2 Mode, ANSI T1.413 and ADSL G.lite.
Chapter 6 WAN Setup Table 19 Network > WAN > Internet Access Setup (continued) LABEL DESCRIPTION IP Address This option is available if you select Routing in the Mode field. A static IP address is a fixed IP that your ISP gives you. A dynamic IP address is not fixed; the ISP assigns you a different one each time you connect to the Internet.
Chapter 6 WAN Setup 6.2.1 Advanced Internet Access Setup Use this screen to edit your ZyXEL Device's advanced WAN settings. Click the Advanced Setup button in the Internet Access Setup screen. The screen appears as shown. Figure 33 Network > WAN > Internet Access Setup: Advanced Setup The following table describes the labels in this screen.
Chapter 6 WAN Setup Table 20 Network > WAN > Internet Access Setup: Advanced Setup (continued) LABEL DESCRIPTION Multicast Multicast packets are sent to a group of computers on the LAN and are an alternative to unicast packets (packets sent to one computer) and broadcast packets (packets sent to every computer). Internet Group Multicast Protocol (IGMP) is a network-layer protocol used to establish membership in a multicast group. The ZyXEL Device supports IGMP-v1, IGMP-v2 and IGMP-v3.
Chapter 6 WAN Setup Table 20 Network > WAN > Internet Access Setup: Advanced Setup (continued) LABEL Protocol Filter DESCRIPTION Select the protocol filter(s) to control incoming traffic. You may choose up to 4 sets of filters. You can configure packet filters in the Packet Filter screen. See Chapter 12 on page 219 for more details. Generic Filter Select the generic filter(s) to control incoming traffic. You may choose up to 4 sets of filters.
Chapter 6 WAN Setup 6.3 The More Connections Screen The ZyXEL Device allows you to configure more than one Internet access connection. To configure additional Internet access connections click Network > WAN > More Connections. The screen differs by the encapsulation you select. When you use the WAN > Internet Access Setup screen to set up Internet access, you are configuring the first WAN connection. Figure 34 Network > WAN > More Connections The following table describes the labels in this screen.
Chapter 6 WAN Setup 6.3.1 More Connections Edit Use this screen to configure a connection. Click the edit icon in the More Connections screen to display the following screen. Figure 35 Network > WAN > More Connections: Edit The following table describes the labels in this screen. Table 22 Network > WAN > More Connections: Edit LABEL DESCRIPTION General 108 Active Select the check box to activate or clear the check box to deactivate this connection.
Chapter 6 WAN Setup Table 22 Network > WAN > More Connections: Edit (continued) LABEL DESCRIPTION Mode Select Routing from the drop-down list box if your ISP allows multiple computers to share an Internet account. If you select Bridge, the ZyXEL Device will forward any packet that it does not route to this remote node; otherwise, the packets are discarded. Encapsulation Select the method of encapsulation used by your ISP from the drop-down list box.
Chapter 6 WAN Setup Table 22 Network > WAN > More Connections: Edit (continued) LABEL Gateway IP address DESCRIPTION This option is available if you select ENET ENCAP in the Encapsulation field. Specify a gateway IP address (supplied by your ISP). Connection Nailed-Up Connection Select Nailed-Up Connection when you want your connection up all the time. The ZyXEL Device will try to bring up the connection automatically if it is disconnected.
Chapter 6 WAN Setup 6.3.2 Configuring More Connections Advanced Setup Use this screen to edit your ZyXEL Device's advanced WAN settings. Click the Advanced Setup button in the More Connections Edit screen. The screen appears as shown. Figure 36 Network > WAN > More Connections: Edit: Advanced Setup The following table describes the labels in this screen.
Chapter 6 WAN Setup Table 23 Network > WAN > More Connections: Edit: Advanced Setup (continued) LABEL DESCRIPTION ATM QoS Type Select CBR (Continuous Bit Rate) to specify fixed (always-on) bandwidth for voice or data traffic. Select UBR (Unspecified Bit Rate) for applications that are non-time sensitive, such as e-mail. Select VBR-nRT (Variable Bit Rate-non Real Time) or VBR-RT (Variable Bit Rate-Real Time) for bursty traffic and bandwidth sharing with other applications.
Chapter 6 WAN Setup Table 23 Network > WAN > More Connections: Edit: Advanced Setup (continued) LABEL DESCRIPTION Apply Click this to save your changes. Cancel Click this to restore your previously saved settings. 6.4 WAN Technical Reference This section provides some technical background information about the topics covered in this chapter. 6.4.1 Encapsulation Be sure to use the encapsulation method required by your ISP. The ZyXEL Device supports the following methods. 6.4.1.
Chapter 6 WAN Setup since the ZyXEL Device does that part of the task. Furthermore, with NAT, all of the LANs’ computers will have access. 6.4.1.3 PPPoA PPPoA stands for Point to Point Protocol over ATM Adaptation Layer 5 (AAL5). A PPPoA connection functions like a dial-up Internet connection.
Chapter 6 WAN Setup and for the VCI is 32 to 65535 (0 to 31 is reserved for local management of ATM traffic). Please see the appendix for more information. 6.4.4 IP Address Assignment A static IP is a fixed IP that your ISP gives you. A dynamic IP is not fixed; the ISP assigns you a different one each time. The Single User Account feature can be enabled or disabled if you have either a dynamic or static IP.
Chapter 6 WAN Setup packet, used within one network to a different IP address known within another network. 6.5 Traffic Shaping Traffic Shaping is an agreement between the carrier and the subscriber to regulate the average rate and fluctuations of data transmission over an ATM network. This agreement helps eliminate congestion, which is important for transmission of real time data such as audio and video connections. Peak Cell Rate (PCR) is the maximum rate at which the sender can send cells.
Chapter 6 WAN Setup 6.5.1 ATM Traffic Classes These are the basic ATM traffic classes defined by the ATM Forum Traffic Management 4.0 Specification. Constant Bit Rate (CBR) Constant Bit Rate (CBR) provides fixed bandwidth that is always available even if no data is being sent. CBR traffic is generally time-sensitive (doesn't tolerate delay). CBR is used for connections that continuously require a specific amount of bandwidth. A PCR is specified and if traffic exceeds this rate, cells may be dropped.
Chapter 6 WAN Setup 118 P-660HW-Tx v3 Series User’s Guide
CHAPTER 7 LAN Setup 7.1 Overview A Local Area Network (LAN) is a shared communication system to which many networking devices are connected. It is usually located in one immediate area such as a building or floor of a building. Use the LAN screens to help you configure a LAN DHCP server and manage IP addresses. LAN DSL 7.1.1 What You Can Do in the LAN Screens • Use the LAN IP screen (Section 7.2 on page 121) to set the LAN IP address and subnet mask of your ZyXEL device.
Chapter 7 LAN Setup 7.1.2 What You Need To Know About LAN IP Address IP addresses identify individual devices on a network. Every networking device (including computers, servers, routers, printers, etc.) needs an IP address to communicate across the network. These networking devices are also known as hosts. Subnet Mask Subnet masks determine the maximum number of possible hosts on a network. You can also use subnet masks to divide one network into multiple sub-networks.
Chapter 7 LAN Setup Finding Out More See Section 7.6 on page 129 for technical background information on LANs. 7.1.3 Before You Begin Find out the MAC addresses of your network devices if you intend to add them to the DHCP Client List screen. 7.2 The LAN IP Screen Use this screen to set the Local Area Network IP address and subnet mask of your ZyXEL Device. Click Network > LAN to open the IP screen. Follow these steps to configure your LAN settings. 1 Enter an IP address into the IP Address field.
Chapter 7 LAN Setup The following table describes the fields in this screen. Table 24 Network > LAN > IP LABEL DESCRIPTION IP Address Enter the LAN IP address you want to assign to your ZyXEL Device in dotted decimal notation, for example, 192.168.1.1 (factory default). IP Subnet Mask Type the subnet mask of your network in dotted decimal notation, for example 255.255.255.0 (factory default).
Chapter 7 LAN Setup The following table describes the labels in this screen. Table 25 Network > LAN > IP: Advanced Setup LABEL DESCRIPTION RIP & Multicast Setup RIP Direction Select the RIP direction from None, Both, In Only and Out Only. RIP Version Select the RIP version from RIP-1, RIP-2B and RIP-2M. Multicast IGMP (Internet Group Multicast Protocol) is a network-layer protocol used to establish membership in a multicast group. The ZyXEL Device supports IGMP-v1, IGMP-v2 and IGMP-v3.
Chapter 7 LAN Setup Table 25 Network > LAN > IP: Advanced Setup LABEL Protocol Filter DESCRIPTION Select the protocol filter(s) to control outgoing traffic. You may choose up to 4 sets of filters. You can configure protocol filters in the Packet Filter screen. See Chapter 12 on page 219 for more details. Generic Filter Select the generic filter(s) to control outgoing traffic. You may choose up to 4 sets of filters. You can configure generic filters in the Packet Filter screen.
Chapter 7 LAN Setup The following table describes the labels in this screen. Table 26 Network > LAN > DHCP Setup LABEL DESCRIPTION DHCP Setup DHCP If set to Server, your ZyXEL Device can assign IP addresses, an IP default gateway and DNS servers to Windows 95, Windows NT and other systems that support the DHCP client. If set to None, the DHCP server will be disabled.
Chapter 7 LAN Setup 7.4 The Client List Screen This table allows you to assign IP addresses on the LAN to specific individual computers based on their MAC Addresses. Every Ethernet device has a unique MAC (Media Access Control) address. The MAC address is assigned at the factory and consists of six pairs of hexadecimal characters, for example, 00:A0:C5:00:00:02. Use this screen to change your ZyXEL Device’s static DHCP settings. Click Network > LAN > Client List to open the following screen.
Chapter 7 LAN Setup Table 27 Network > LAN > Client List LABEL DESCRIPTION Reserve Select the check box in the heading row to automatically select all check boxes or select the check box(es) in each entry to have the ZyXEL Device always assign the selected entry(ies)’s IP address(es) to the corresponding MAC address(es) (and host name(s)). You can select up to 10 entries in this table. Modify Click the modify icon to have the IP address field editable and change it.
Chapter 7 LAN Setup 7.5.1 Configuring the LAN IP Alias Screen Use this screen to change your ZyXEL Device’s IP alias settings. Click Network > LAN > IP Alias to open the following screen. Figure 43 Network > LAN > IP Alias The following table describes the labels in this screen. Table 28 Network > LAN > IP Alias LABEL DESCRIPTION IP Alias 1, 2 Select the check box to configure another LAN network for the ZyXEL Device. IP Address Enter the IP address of your ZyXEL Device in dotted decimal notation.
Chapter 7 LAN Setup Table 28 Network > LAN > IP Alias LABEL DESCRIPTION RIP Version The RIP Version field controls the format and the broadcasting method of the RIP packets that the ZyXEL Device sends (it recognizes both formats when receiving). RIP-1 is universally supported but RIP-2 carries more information. RIP-1 is probably adequate for most networks, unless you have an unusual network topology.
Chapter 7 LAN Setup 7.6.2 DHCP Setup DHCP (Dynamic Host Configuration Protocol, RFC 2131 and RFC 2132) allows individual clients to obtain TCP/IP configuration at start-up from a server. You can configure the ZyXEL Device as a DHCP server or disable it. When configured as a server, the ZyXEL Device provides the TCP/IP configuration for the clients. If you turn DHCP service off, you must have another DHCP server on your LAN, or else the computer must be manually configured.
Chapter 7 LAN Setup 7.6.4 LAN TCP/IP The ZyXEL Device has built-in DHCP server capability that assigns IP addresses and DNS servers to systems that support DHCP client capability. IP Address and Subnet Mask Similar to the way houses on a street share a common street name, so too do computers on a LAN share one common network number. Where you obtain your network number depends on your particular situation.
Chapter 7 LAN Setup • 192.168.0.0 — 192.168.255.255 You can obtain your IP address from the IANA, from an ISP or it can be assigned from a private network. If you belong to a small organization and your Internet access is through an ISP, the ISP can provide you with the Internet addresses for your local networks. On the other hand, if you are part of a much larger organization, you should consult your network administrator for the appropriate IP addresses.
Chapter 7 LAN Setup IGMP (Internet Group Multicast Protocol) is a network-layer protocol used to establish membership in a Multicast group - it is not used to carry user data. IGMP version 2 (RFC 2236) is an improvement over version 1 (RFC 1112) but IGMP version 1 is still in wide use. IGMP version 3 supports source filtering, reporting or ignoring traffic from specific source address to a particular host on the network.
Chapter 7 LAN Setup without changing the network settings, even when the IP addresses of the computer and the ZyXEL Device are not in the same subnet. Figure 45 Any IP Example 192.168.10.1 192.168.10.1 192.168.1.1 The Any IP feature does not apply to a computer using either a dynamic IP address or a static IP address that is in the same subnet as the ZyXEL Device’s IP address. Note: You must enable NAT/SUA to use the Any IP feature on the ZyXEL Device.
Chapter 7 LAN Setup 4 The computer updates the MAC address for the default gateway to the ARP table. Once the ARP table is updated, the computer is able to access the Internet through the ZyXEL Device. 5 When the ZyXEL Device receives packets from the computer, it creates an entry in the IP routing table so it can properly forward packets intended for the computer.
Chapter 7 LAN Setup 136 P-660HW-Tx v3 Series User’s Guide
CHAPTER 8 Wireless LAN 8.1 Overview This chapter describes how to perform tasks related to setting up and optimizing your wireless network, including the following. • Turning the wireless connection on or off. • Configuring a name, wireless channel and security for the network. • Using WiFi Protected Setup (WPS) to configure your wireless network. • Setting up multiple wireless networks. • Using a MAC (Media Access Control) address filter to restrict access to the wireless network.
Chapter 8 Wireless LAN You don’t necessarily need to use all these screens to set up your wireless connection. For example, you may just want to set up a network name, a wireless radio channel and security in the AP screen. 8.1.2 What You Need to Know About Wireless Wireless Basics “Wireless” is essentially radio communication. In the same way that walkie-talkie radios send and receive information over the airwaves, wireless networking devices exchange information with one another.
Chapter 8 Wireless LAN • What wireless standards do the other wireless devices in your network support (IEEE 802.11g, for example)? What is the most appropriate standard to use? • What security options do the other wireless devices in your network support (WPA-PSK, for example)? What is the strongest security option supported by all the devices in your network? • Do the other wireless devices in your network support WPS (Wi-Fi Protected Setup)? If so, you can set up a well-secured network very easily.
Chapter 8 Wireless LAN The following table describes the labels in this screen. Table 29 Network > Wireless LAN > AP LABEL DESCRIPTION Wireless Setup Active Wireless LAN Click the check box to activate wireless LAN. Auto-Scan Channel Select this option to have the ZyXEL Device automatically scan for and select a channel which is not used by another device. Channel Selection Set the operating frequency/channel depending on your particular region.
Chapter 8 Wireless LAN Table 29 Network > Wireless LAN > AP LABEL DESCRIPTION QoS This shows whether Quality of Service (QoS) is activated or the priority level for wireless traffic with this SSID. Select a priority level from the drop-down list box. Choices are None, Default, Highest, High, Middle and Low. Select None to disable QoS. Select Default to have the ZyXEL Device automatically give traffic a priority level according to the ToS value in the IP header of packets it sends.
Chapter 8 Wireless LAN 8.2.2 WEP Encryption Use this screen to configure and enable WEP encryption. Click Network > Wireless LAN to display the AP screen. Select Static WEP from the Security Mode list. Note: WEP is extremely insecure. Its encryption can be broken by an attacker, using widely-available software. It is strongly recommended that you use a more effective security mechanism. Use the strongest security mechanism that all the wireless devices in your network support.
Chapter 8 Wireless LAN 8.2.3 WPA(2)-PSK Use this screen to configure and enable WPA(2)-PSK authentication. Click Network > Wireless LAN to display the AP screen. Select WPA-PSK or WPA2PSK from the Security Mode list. Figure 49 Network > Wireless LAN > AP: WPA(2)-PSK The following table describes the wireless LAN security labels in this screen. Table 32 Network > Wireless LAN > AP: WPA(2)-PSK LABEL DESCRIPTION Security Mode Choose WPA-PSK or WPA2-PSK from the drop-down list box.
Chapter 8 Wireless LAN Table 32 Network > Wireless LAN > AP: WPA(2)-PSK LABEL DESCRIPTION Idle Timeout The ZyXEL Device automatically disconnects a wireless station from the wired network after a period of inactivity. The wireless station needs to enter the username and password again before access to the wired network is allowed. The default time interval is 3600 seconds (or 1 hour).
Chapter 8 Wireless LAN The following table describes the wireless LAN security labels in this screen. Table 33 Network > Wireless LAN > AP: WPA(2) LABEL DESCRIPTION Security Mode Choose WPA or WPA2 from the drop-down list box. WPA Compatible This check box is available only when you select WPA2-PSK or WPA2 in the Security Mode field. Select the check box to have both WPA-PSK and WPA wireless clients be able to communicate with the ZyXEL Device even when the ZyXEL Device is using WPA2-PSK or WPA2.
Chapter 8 Wireless LAN Table 33 Network > Wireless LAN > AP: WPA(2) LABEL Port Number DESCRIPTION Enter the port number of the external accounting server. You need not change this value unless your network administrator instructs you to do so with additional information. Shared Secret Enter a password (up to 31 alphanumeric characters) as the key to be shared between the external accounting server and the ZyXEL Device. The key must be the same on the external accounting server and your ZyXEL Device.
Chapter 8 Wireless LAN Table 34 Network > Wireless LAN > AP: Advanced Setup LABEL DESCRIPTION 802.11 Mode Select 802.11b Only to allow only IEEE 802.11b compliant WLAN devices to associate with the ZyXEL Device. Select 802.11g Only to allow only IEEE 802.11g compliant WLAN devices to associate with the ZyXEL Device. Select Mixed to allow either IEEE 802.11b or IEEE 802.11g compliant WLAN devices to associate with the ZyXEL Device. The transmission rate of your ZyXEL Device might be reduced.
Chapter 8 Wireless LAN The following table describes the labels in this screen. Table 35 Network > Wireless LAN > AP: MAC Address Filter LABEL DESCRIPTION Active MAC Filter Select the check box to enable MAC address filtering. Filter Action Define the filter action for the list of MAC addresses in the MAC Address table. Select Deny to block access to the ZyXEL Device. MAC addresses not listed will be allowed to access the ZyXEL Device Select Allow to permit access to the ZyXEL Device.
Chapter 8 Wireless LAN The following table describes the labels in this screen. Table 36 Network > Wireless LAN > More AP LABEL DESCRIPTION # This is the index number of each SSID profile. Active Select the check box to activate an SSID profile. SSID An SSID profile is the set of parameters relating to one of the ZyXEL Device’s BSSs. The SSID (Service Set IDentifier) identifies the Service Set with which a wireless device is associated.
Chapter 8 Wireless LAN The following table describes the fields in this screen. Table 37 Network > Wireless LAN > More AP: Edit LABEL DESCRIPTION Network Name (SSID) The SSID (Service Set IDentity) identifies the service set with which a wireless device is associated. Enter a descriptive name (up to 32 printable 7-bit ASCII characters) for the wireless LAN.
Chapter 8 Wireless LAN 8.4 The WPS Screen Use this screen to configure WiFi Protected Setup (WPS) on your ZyXEL Device. WPS allows you to quickly set up a wireless network with strong security, without having to configure security settings manually. Set up each WPS connection between two devices. Both devices must support WPS. Click Network > Wireless LAN > WPS. The following screen displays. Figure 55 Network > Wireless LAN > WPS The following table describes the labels in this screen.
Chapter 8 Wireless LAN Table 38 Network > Wireless LAN > WPS LABEL Release_Co nfiguration DESCRIPTION This button is available when the WPS status is Configured. Click this button to remove all configured wireless and wireless security settings for WPS connections on the ZyXEL Device. Apply Click this to save your changes. Refresh Click this to restore your previously saved settings. 8.
Chapter 8 Wireless LAN The following table describes the labels in this screen. Table 39 Network > Wireless LAN > WPS Station LABEL DESCRIPTION Push Button Click this to add another WPS-enabled wireless device (within wireless range of the ZyXEL Device) to your wireless network. This button may either be a physical button on the outside of device, or a menu button similar to the Push Button on this screen.
Chapter 8 Wireless LAN Click Network > Wireless LAN > WDS. The following screen displays. Figure 57 Network > Wireless LAN > WDS The following table describes the labels in this screen. Table 40 Network > Wireless LAN > WDS LABEL DESCRIPTION Enable WDS Security Select this option and the type of the key used to encrypt data between APs. All the wireless APs (including the ZyXEL Device) must use the same pre-shared key for data transmission.
Chapter 8 Wireless LAN 8.7 The Scheduling Screen Use the wireless LAN scheduling to configure the days you want to enable or disable the wireless LAN. Click Network > Wireless LAN > Scheduling. The following screen displays. Figure 58 Network > Wireless LAN > Scheduling The following table describes the labels in this screen. Table 41 Network > Wireless LAN > QoS LABEL DESCRIPTION Enable Wireless LAN Scheduling Select this box to activate wireless LAN scheduling on your ZyXEL Device.
Chapter 8 Wireless LAN 8.8 Wireless LAN Technical Reference This section discusses wireless LANs in depth. For more information, see the appendix. 8.8.1 Wireless Network Overview Wireless networks consist of wireless clients, access points and bridges. • A wireless client is a radio connected to a user’s computer. • An access point is a radio with a wired connection to a network, which can connect with numerous wireless clients and let them access the network.
Chapter 8 Wireless LAN The wireless network is the part in the blue circle. In this wireless network, devices A and B use the access point (AP) to interact with the other devices (such as the printer) or with the Internet. Your ZyXEL Device is the AP. Every wireless network must follow these basic guidelines. • Every device in the same wireless network must use the same SSID. The SSID is the name of the wireless network. It stands for Service Set IDentifier.
Chapter 8 Wireless LAN 8.8.2 Additional Wireless Terms The following table describes some wireless network terms and acronyms used in the ZyXEL Device’s Web Configurator. Table 42 Additional Wireless Terms TERM DESCRIPTION RTS/CTS Threshold In a wireless network which covers a large area, wireless devices are sometimes not aware of each other’s presence. This may cause them to send information to the AP at the same time and result in information colliding and not getting through.
Chapter 8 Wireless LAN These security standards vary in effectiveness. Some can be broken, such as the old Wired Equivalent Protocol (WEP). Using WEP is better than using no security at all, but it will not keep a determined attacker out. Other security standards are secure in themselves but can be broken if a user does not use them properly.
Chapter 8 Wireless LAN You can use the MAC address filter to tell the ZyXEL Device which devices are allowed or not allowed to use the wireless network. If a device is allowed to use the wireless network, it still has to have the correct information (SSID, channel, and security). If a device is not allowed to use the wireless network, it does not matter if it has the correct information. This type of security does not protect the information that is sent in the wireless network.
Chapter 8 Wireless LAN For example, if the wireless network has a RADIUS server, you can choose WPA or WPA2. If users do not log in to the wireless network, you can choose no encryption, Static WEP, WPA-PSK, or WPA2-PSK. Usually, you should set up the strongest encryption that every device in the wireless network supports. For example, suppose you have a wireless network with the ZyXEL Device and you do not have a RADIUS server. Therefore, there is no authentication.
Chapter 8 Wireless LAN and communicate with each other. When Intra-BSS traffic blocking is enabled, wireless station A and B can still access the wired network but cannot communicate with each other. Figure 60 Basic Service set 8.8.6 MBSSID Traditionally, you need to use different APs to configure different Basic Service Sets (BSSs). As well as the cost of buying extra APs, there is also the possibility of channel interference.
Chapter 8 Wireless LAN 8.8.7 Wireless Distribution System (WDS) The ZyXEL Device can act as a wireless network bridge and establish WDS (Wireless Distribution System) links with other APs. You need to know the MAC addresses of the APs you want to link to. Once the security settings of peer sides match one another, the connection between devices is made. At the time of writing, WDS security is compatible with other ZyXEL access points only. Refer to your other access point’s documentation for details.
Chapter 8 Wireless LAN 8.8.8.1 Push Button Configuration WPS Push Button Configuration (PBC) is initiated by pressing a button on each WPS-enabled device, and allowing them to connect automatically. You do not need to enter any information. Not every WPS-enabled device has a physical WPS button. Some may have a WPS PBC button in their configuration utilities instead of or in addition to the physical button. Take the following steps to set up WPS using the button.
Chapter 8 Wireless LAN Take the following steps to set up a WPS connection between an access point or wireless router (referred to here as the AP) and a client device using the PIN method. 1 Ensure WPS is enabled on both devices. 2 Access the WPS section of the AP’s configuration interface. See the device’s User’s Guide for how to do this.
Chapter 8 Wireless LAN The following figure shows a WPS-enabled wireless client (installed in a notebook computer) connecting to the WPS-enabled AP via the PIN method. Figure 62 Example WPS Process: PIN Method ENROLLEE REGISTRAR WPS This device’s WPS PIN: 123456 WPS Enter WPS PIN from other device: WPS START WPS START WITHIN 2 MINUTES SECURE EAP TUNNEL SSID WPA(2)-PSK COMMUNICATION 8.8.8.3 How WPS Works When two WPS-enabled devices connect, each device must assume a specific role.
Chapter 8 Wireless LAN The following figure shows a WPS-enabled client (installed in a notebook computer) connecting to a WPS-enabled access point. Figure 63 How WPS works ACTIVATE WPS ACTIVATE WPS WITHIN 2 MINUTES WPS HANDSHAKE ENROLLEE REGISTRAR SECURE TUNNEL SECURITY INFO COMMUNICATION The roles of registrar and enrollee last only as long as the WPS setup process is active (two minutes). The next time you use WPS, a different device can be the registrar if necessary.
Chapter 8 Wireless LAN 8.8.8.4 Example WPS Network Setup This section shows how security settings are distributed in an example WPS setup. The following figure shows an example network. In step 1, both AP1 and Client 1 are unconfigured. When WPS is activated on both, they perform the handshake. In this example, AP1 is the registrar, and Client 1 is the enrollee. The registrar randomly generates the security information to set up the network, since it is unconfigured and has no existing information.
Chapter 8 Wireless LAN point. However, you know that Client 2 supports the registrar function, so you use it to perform the WPS handshake instead. Figure 66 WPS: Example Network Step 3 EXISTING CONNECTION CLIENT 1 E N TIO EC N ON GC N I T XIS AP1 REGISTRAR CLIENT 2 SE CU RIT Y ENROLLEE INF O AP2 8.8.8.5 Limitations of WPS WPS has some limitations of which you should be aware. • WPS works in Infrastructure networks only (where an AP and a wireless client communicate).
Chapter 8 Wireless LAN • When you use the PBC method, there is a short period (from the moment you press the button on one device to the moment you press the button on the other device) when any WPS-enabled device could join the network. This is because the registrar has no way of identifying the “correct” enrollee, and cannot differentiate between your enrollee and a rogue device. This is a possible way for a hacker to gain access to a network. You can easily check to see if this has happened.
CHAPTER 9 Network Address Translation (NAT) 9.1 Overview This chapter discusses how to configure NAT on the ZyXEL Device. NAT (Network Address Translation - NAT, RFC 1631) is the translation of the IP address of a host in a packet, for example, the source address of an outgoing packet, used within one network to a different IP address known within another network. 9.1.1 What You Can Do in the NAT Screens • Use the NAT General Setup screen (Section 9.2 on page 173) to configure the NAT setup settings.
Chapter 9 Network Address Translation (NAT) NAT In the simplest form, NAT changes the source IP address in a packet received from a subscriber (the inside local address) to another (the inside global address) before forwarding the packet to the WAN side. When the response comes back, NAT translates the destination address (the inside global address) back to the inside local address before forwarding it to the original inside host.
Chapter 9 Network Address Translation (NAT) 9.2 The NAT General Setup Screen Use this screen to activate NAT. Click Network > NAT to open the following screen. Note: You must create a firewall rule in addition to setting up SUA/NAT, to allow traffic from the WAN to be forwarded through the ZyXEL Device. Figure 67 Network > NAT > General The following table describes the labels in this screen.
Chapter 9 Network Address Translation (NAT) Table 44 Network > NAT > General (continued) LABEL DESCRIPTION Apply Click this to save your changes. Cancel Click this to restore your previously saved settings. 9.3 The Port Forwarding Screen Note: This screen is available only when you select SUA only in the NAT > General screen. Use this screen to forward incoming service requests to the server(s) on your local network.
Chapter 9 Network Address Translation (NAT) Configuring Servers Behind Port Forwarding (Example) Let's say you want to assign ports 21-25 to one FTP, Telnet and SMTP server (A in the example), port 80 to another (B in the example) and assign a default server IP address of 192.168.1.35 to a third (C in the example). You assign the LAN IP addresses and the ISP assigns the WAN IP address. The NAT network appears as a single host on the Internet. Figure 68 Multiple Servers Behind NAT Example A=192.168.1.
Chapter 9 Network Address Translation (NAT) The following table describes the fields in this screen. Table 45 Network > NAT > Port Forwarding LABEL DESCRIPTION Default Server Setup Default Server In addition to the servers for specified services, NAT supports a default server. A default server receives packets from ports that are not specified in this screen.
Chapter 9 Network Address Translation (NAT) 9.3.2 The Port Forwarding Rule Edit Screen Use this screen to edit a port forwarding rule. Click the rule’s edit icon in the Port Forwarding screen to display the screen shown next. Figure 70 Network > NAT > Port Forwarding: Edit The following table describes the fields in this screen. Table 46 Network > NAT > Port Forwarding: Edit LABEL DESCRIPTION Active Click this check box to enable the rule.
Chapter 9 Network Address Translation (NAT) 9.4 The Address Mapping Screen Note: The Address Mapping screen is available only when you select Full Feature in the NAT > General screen. Ordering your rules is important because the ZyXEL Device applies the rules in the order that you specify. When a rule matches the current packet, the ZyXEL Device takes the corresponding action and the remaining rules are ignored.
Chapter 9 Network Address Translation (NAT) Table 47 Network > NAT > Address Mapping (continued) LABEL DESCRIPTION Global End IP This is the ending Inside Global IP Address (IGA). This field is N/A for One-to-one, Many-to-One and Server mapping types. Type 1-1: One-to-one mode maps one local IP address to one global IP address. Note that port numbers do not change for the One-to-one NAT mapping type. M-1: Many-to-One mode maps multiple local IP addresses to one global IP address.
Chapter 9 Network Address Translation (NAT) The following table describes the fields in this screen. Table 48 Network > NAT > Address Mapping: Edit LABEL DESCRIPTION Type Choose the port mapping type from one of the following. One-to-One: One-to-One mode maps one local IP address to one global IP address. Note that port numbers do not change for One-to-one NAT mapping type. Many-to-One: Many-to-One mode maps multiple local IP addresses to one global IP address. This is equivalent to SUA (i.e.
Chapter 9 Network Address Translation (NAT) 9.5 The SIP ALG Screen Some NAT routers may include a SIP Application Layer Gateway (ALG). A SIP ALG allows SIP calls to pass through NAT by examining and translating IP addresses embedded in the data stream. When the ZyXEL Device registers with the SIP register server, the SIP ALG translates the ZyXEL Device’s private IP address inside the SIP data stream to a public IP address.
Chapter 9 Network Address Translation (NAT) packet is in the local network, while the global address refers to the IP address of the host when the same packet is traveling in the WAN side. Note that inside/outside refers to the location of a host, while global/local refers to the IP address of a host used in a packet.
Chapter 9 Network Address Translation (NAT) 9.6.3 How NAT Works Each packet has two addresses – a source address and a destination address. For outgoing packets, the ILA (Inside Local Address) is the source address on the LAN, and the IGA (Inside Global Address) is the source address on the WAN. For incoming packets, the ILA is the destination address on the LAN, and the IGA is the destination address on the WAN.
Chapter 9 Network Address Translation (NAT) 9.6.4 NAT Application The following figure illustrates a possible NAT application, where three inside LANs (logical LANs using IP alias) behind the ZyXEL Device can communicate with three distinct WAN networks. Figure 75 NAT Application With IP Alias 9.6.5 NAT Mapping Types NAT supports five types of IP/port mapping. They are: • One to One: In One-to-One mode, the ZyXEL Device maps one local IP address to one global IP address.
Chapter 9 Network Address Translation (NAT) Port numbers do NOT change for One-to-One and Many-to-Many No Overload NAT mapping types. The following table summarizes these types.
Chapter 9 Network Address Translation (NAT) 186 P-660HW-Tx v3 Series User’s Guide
P ART IV Security Firewalls (189) Content Filtering (211) Packet Filter (219) Certificates (229) 187
CHAPTER 10 Firewalls 10.1 Overview This chapter shows you how to enable and configure the ZyXEL Device firewall. Use these screens to enable and configure the firewall that protects your ZyXEL Device and network from attacks by hackers on the Internet and control access to it. By default the firewall: • allows traffic that originates from your LAN computers to go to all other networks. • blocks traffic that originates on other networks from going to the LAN.
Chapter 10 Firewalls • Use the Threshold screen (Section 10.4 on page 202) to set the thresholds that the ZyXEL Device uses to determine when to start dropping sessions that do not become fully established (half-open sessions). 10.1.2 What You Need to Know About Firewall DoS Denials of Service (DoS) attacks are aimed at devices and networks with a connection to the Internet. Their goal is not to steal information, but to disable a device or network so users no longer have access to network resources.
Chapter 10 Firewalls 10.1.3 Firewall Rule Setup Example The following Internet firewall rule example allows a hypothetical “MyService” connection from the Internet. 1 Click Security > Firewall > Rules. 2 Select WAN to LAN in the Packet Direction field. Firewall Example: Rules 3 In the Rules screen, select the index number after that you want to add the rule. For example, if you select “6”, your new rule becomes number 7 and the previous rule 7 (if there is one) becomes rule 8.
Chapter 10 Firewalls 6 Click an index number to display the Customized Services Config screen and configure the screen as follows and click Apply. Edit Custom Port Example 7 Select Any in the Destination Address List box and then click Delete. 8 Configure the destination address screen as follows and click Add.
Chapter 10 Firewalls 9 Use the Add >> and Remove buttons between Available Services and Selected Services list boxes to configure it as follows. Click Apply when you are done. Note: Custom services show up with an “*” before their names in the Services list box and the Rules list box.
Chapter 10 Firewalls On completing the configuration procedure for this Internet firewall rule, the Rules screen should look like the following. Rule 1 allows a “MyService” connection from the WAN to IP addresses 10.0.0.10 through 10.0.0.15 on the LAN. Firewall Example: Rules: MyService 10.2 The Firewall General Screen Use this screen to configure the firewall settings. Click Security > Firewall to display the following screen.
Chapter 10 Firewalls The following table describes the labels in this screen. Table 52 Security > Firewall > General LABEL DESCRIPTION Active Firewall Select this check box to activate the firewall. The ZyXEL Device performs access control and protects against Denial of Service (DoS) attacks when the firewall is activated.
Chapter 10 Firewalls 10.3 The Firewall Rule Screen Note: The ordering of your rules is very important as rules are applied in turn. Refer to Section 10.5 on page 205 for more information. Click Security > Firewall > Rules to bring up the following screen. This screen displays a list of the configured firewall rules. Note the order in which the rules are listed. Figure 78 Security > Firewall > Rules The following table describes the labels in this screen.
Chapter 10 Firewalls Table 53 Security > Firewall > Rules (continued) LABEL DESCRIPTION Destination IP This drop-down list box displays the destination addresses or ranges of addresses to which this firewall rule applies. Please note that a blank source or destination address is equivalent to Any. Service This drop-down list box displays the services to which this firewall rule applies. See Appendix E on page 411 for more information.
Chapter 10 Firewalls 10.3.1 Configuring Firewall Rules Refer to Section 10.1.2 on page 190 for more information. Use this screen to configure firewall rules. In the Rules screen, select an index number and click Add or click a rule’s Edit icon to display this screen and refer to the following table for information on the labels.
Chapter 10 Firewalls The following table describes the labels in this screen. Table 54 Security > Firewall > Rules: Edit LABEL DESCRIPTION Edit Rule Active Select this option to enable this firewall rule. Action for Matched Packet Use the drop-down list box to select whether to discard (Drop), deny and send an ICMP destination-unreachable message to the sender of (Reject) or allow the passage of (Permit) packets that match this rule.
Chapter 10 Firewalls Table 54 Security > Firewall > Rules: Edit (continued) LABEL DESCRIPTION Send Alert Message to Administrator When Matched Select the check box to have the ZyXEL Device generate an alert when the rule is matched. Back Click this to return to the previous screen without saving. Apply Click this to save your changes. Cancel Click this to restore your previously saved settings. 10.3.
Chapter 10 Firewalls 10.3.3 Configuring a Customized Service Use this screen to add a customized rule or edit an existing rule. Click a rule number in the Firewall Customized Services screen to display the following screen. Figure 81 Security > Firewall > Rules: Edit: Edit Customized Services: Config The following table describes the labels in this screen.
Chapter 10 Firewalls 10.4 The Firewall Threshold Screen For DoS attacks, the ZyXEL Device uses thresholds to determine when to start dropping sessions that do not become fully established (half-open sessions). These thresholds apply globally to all sessions. For TCP, half-open means that the session has not reached the established statethe TCP three-way handshake has not yet been completed.
Chapter 10 Firewalls 5 Type of traffic for certain servers. Reduce the threshold values if your network is slower than average for any of these factors (especially if you have servers that are slow or handle many tasks and are often busy). • If you often use P2P applications such as file sharing with eMule or eDonkey, it’s recommended that you increase the threshold values since lots of sessions will be established during a small period of time and the ZyXEL Device may classify them as DoS attacks. 10.4.
Chapter 10 Firewalls Table 57 Security > Firewall > Threshold (continued) LABEL DESCRIPTION One Minute High This is the rate of new half-open sessions per minute that causes the firewall to start deleting half-open sessions. When the rate of new connection attempts rises above this number, the ZyXEL Device deletes half-open sessions as required to accommodate new connection attempts.
Chapter 10 Firewalls 10.5 Firewall Technical Reference This section provides some technical background information about the topics covered in this chapter. 10.5.1 Firewall Rules Overview Your customized rules take precedence and override the ZyXEL Device’s default settings. The ZyXEL Device checks the source IP address, destination IP address and IP protocol type of network traffic against the firewall rules (in the order you list them).
Chapter 10 Firewalls • WAN to WAN/ Router By default the ZyXEL Device stops computers on the WAN from managing the ZyXEL Device or using the ZyXEL Device as a gateway to communicate with other computers on the WAN. You could configure one of these rules to allow a WAN computer to manage the ZyXEL Device. Note: You also need to configure the remote management settings to allow a WAN computer to manage the ZyXEL Device.
Chapter 10 Firewalls 10.5.3 Security Considerations Note: Incorrectly configuring the firewall may block valid access or introduce security risks to the ZyXEL Device and your protected network. Use caution when creating or deleting firewall rules and test your rules after you configure them.
Chapter 10 Firewalls 10.5.4.1 The “Triangle Route” Problem A traffic route is a path for sending or receiving data packets between two Ethernet devices. You may have more than one connection to the Internet (through one or more ISPs). If an alternate gateway is on the LAN (and its IP address is in the same subnet as the ZyXEL Device’s LAN IP address), the “triangle route” (also called asymmetrical route) problem may occur. The steps below describe the “triangle route” problem.
Chapter 10 Firewalls It’s like having multiple LAN networks that actually use the same physical cables and ports. By putting your LAN and Gateway A in different subnets, all returning network traffic must pass through the ZyXEL Device to your LAN. The following steps describe such a scenario. 1 A computer on the LAN initiates a connection by sending a SYN packet to a receiving server on the WAN. 2 The ZyXEL Device reroutes the packet to Gateway A, which is in Subnet 2.
Chapter 10 Firewalls 210 P-660HW-Tx v3 Series User’s Guide
CHAPTER 11 Content Filtering 11.1 Overview Internet content filtering allows you to block web sites based on keywords in the URL. See Section 11.1.4 on page 212 for an example of setting up content filtering. 11.1.1 What You Can Do in the Content Filter Screens • Use the Keyword screen (Section 11.2 on page 214) to block web sites based on a keyword in the URL. • Use the Schedule screen (Section 11.3 on page 215) to specify the days and times keyword blocking is active.
Chapter 11 Content Filtering 11.1.4 Content Filtering Example The following shows the steps required for a parent (Bob) to set up content filtering on a home network in order to limit his children’s access to certain web sites. In the following example, all URLs containing the word ‘bad’ are blocked. 1 Click Security > Content Filter to display the following screen. 2 Select Active Keyword Blocking. 3 In the Keyword field type keywords to identify websites to be blocked.
Chapter 11 Content Filtering 4 Click Apply. Security > Content Filter > Schedule: Example The children can access the family computer in the living room, while only the parents use another computer in the study room. So keyword blocking is only needed on the family computer and the study computer can be excluded from keyword blocking. Bob’s home network is on the domain “192.168.1.xxx”. Bob gave his home computer a static IP address of 192.168.1.2 and the study computer a static IP address of 192.168.1.
Chapter 11 Content Filtering 11.2 The Keyword Screen Use this screen to block sites containing certain keywords in the URL. For example, if you enable the keyword "bad", the ZyXEL Device blocks all sites containing this keyword including the URL http://www.website.com/bad.html. To have your ZyXEL Device block websites containing keywords in their URLs, click Security > Content Filter. The screen appears as shown.
Chapter 11 Content Filtering Table 58 Security > Content Filtering > Keyword (continued) LABEL DESCRIPTION Add Keyword Click this after you have typed a keyword. Repeat this procedure to add other keywords. Up to 64 keywords are allowed. When you try to access a web page containing a keyword, you will get a message telling you that the content filter is blocking this request. Apply Click this to save your changes. Cancel Click this to restore your previously saved settings. 11.
Chapter 11 Content Filtering The following table describes the labels in this screen. Table 59 Security > Content Filter: Schedule LABEL DESCRIPTION Schedule Select Block Everyday to make the content filtering active everyday. Otherwise, select Edit Daily to Block and configure which days of the week (or everyday) and which time of the day you want the content filtering to be active. Active Select the check box to have the content filtering to be active on the selected day.
Chapter 11 Content Filtering Table 60 Security > Content Filter: Trusted (continued) LABEL DESCRIPTION Apply Click this to save your changes. Cancel Click this to restore your previously saved settings.
Chapter 11 Content Filtering 218 P-660HW-Tx v3 Series User’s Guide
CHAPTER 12 Packet Filter 12.1 Overview Your ZyXEL Device uses filters to decide whether to allow passage of traffic. This chapter discusses how to create and apply filters. 12.1.1 What You Can Do in the Packet Filter Screen Use the Packet Filter screens (Section 12.2 on page 220) to display the filter sets and configure the rules for protocol and generic filters. 12.1.
Chapter 12 Packet Filter 12.2 The Packet Filter Screen Use this screen to set up packet filters on your ZyXEL Device. Click Security > Packet Filter to display the following screen. Figure 90 Security > Packet Filter The following table describes the labels in this screen. Table 61 Security > Packet Filter LABEL DESCRIPTION # This field displays the index number of the filter set. Name Enter a name for the filter set.
Chapter 12 Packet Filter 12.2.1 Editing Protocol Filters Use this screen to display a protocol filter set on your ZyXEL Device. Protocol rules allow you to base the rule on the fields in the IP and the upper layer protocol, for example, UDP and TCP headers. In the Packet Filter screen, select Protocol Filter from the Filter Type field. Then click the Edit button from the Modify field to display the following screen.
Chapter 12 Packet Filter 12.2.2 Configuring Protocol Filter Rules Use this screen to configure protocol filter rules. In the Edit (Protocol Filter) screen, click an Edit icon to display the following screen. Figure 92 Security > Packet Filter > Edit (Protocol Filter) > Edit Rule The following table describes the labels in this screen. Table 63 Security > Packet Filter > Edit (Protocol Filter) > Edit Rule 222 LABEL DESCRIPTION Active Select the check box to enable the filter rule.
Chapter 12 Packet Filter Table 63 Security > Packet Filter > Edit (Protocol Filter) > Edit Rule (continued) LABEL DESCRIPTION Port Compare Select the comparison to apply to the destination port in the packet against the value given in the Destination Port field. Options are None, Equal, Not Equal, Less and Greater. Source Address Enter the source IP address of the packet you wish to filter. This field is ignored if it is 0.0.0.0.
Chapter 12 Packet Filter Offset (from 0) and the Length fields, both in bytes. The ZyXEL Device applies the Mask (bit-wise ANDing) to the data portion before comparing the result against the Value to determine a match. The Mask and Value are specified in hexadecimal numbers. Note that it takes two hexadecimal digits to represent a byte, so if the length is 4 bytes, the value in either field will take 8 digits, for example, FFFFFFFF.
Chapter 12 Packet Filter 12.2.4 Configuring Generic Packet Rules Use this screen to configure generic filter rules. In the Edit (Generic Filter) screen, click the Edit button from the Modify field to display the following screen. Figure 94 Security > Packet Filter > Edit (Generic Filter) > Edit Rule The following table describes the labels in this screen. Table 65 Security > Packet Filter > Edit (Generic Filter) > Edit Rule LABEL DESCRIPTION Active Select the check box to enable the filter rule.
Chapter 12 Packet Filter Table 65 Security > Packet Filter > Edit (Generic Filter) > Edit Rule (continued) LABEL DESCRIPTION Log Select a logging option from the following: None – No packets will be logged. Match - Only packets that match the rule parameters will be logged. Not Match - Only packets that do not match the rule parameters will be logged. Both – All packets will be logged. Action Match Select the action for a matching packet. Options are Check Next Rule, Forward and Drop.
Chapter 12 Packet Filter receiving and sending the packets; that is the interface. The interface can be an Ethernet port or any other hardware port. The following diagram illustrates this. Figure 95 Protocol and Generic Filter Sets Route Protocol Filters NAT Generic Filters Incoming Interface Outgoing 12.3.2 Firewall Versus Filters Below are some comparisons between the ZyXEL Device’s filtering and firewall functions.
Chapter 12 Packet Filter • The firewall performs stateful inspection. It takes into account the state of connections it handles so that, for example, a legitimate incoming packet can be matched with the outbound request for that packet and allowed in. Conversely, an incoming packet masquerading as a response to a non-existent outbound request can be blocked. • The firewall uses session filtering, i.e.
CHAPTER 13 Certificates 13.1 Overview This chapter describes how your ZyXEL Device can use certificates as a means of authenticating wireless clients. It gives background information about public-key certificates and explains how to use them. A certificate contains the certificate owner’s identity and public key. Certificates provide a way to exchange public keys for use in authentication.
Chapter 13 Certificates information and public keys and then send the certification requests to a certification authority. Certificate File Formats The certification authority certificate that you want to import has to be in one of these file formats: • Binary X.509: This is an ITU-T recommendation that defines the formats for X.509 certificates. • PEM (Base-64) encoded X.509: This Privacy Enhanced Mail format uses lowercase letters, uppercase letters and numerals to convert a binary X.
Chapter 13 Certificates The following table describes the labels in this screen. Table 66 Trusted CAs LABEL DESCRIPTION PKI Storage Space in Use This bar displays the percentage of the ZyXEL Device’s PKI storage space that is currently in use. The bar turns from blue to red when the maximum is being approached. When the bar is red, you should consider deleting expired or unnecessary certificates before adding more certificates. # This field displays the certificate index number.
Chapter 13 Certificates 13.2.1 Trusted CA Import Follow the instructions in this screen to save a trusted certification authority’s certificate to the ZyXEL Device. Click Security > Certificates to open the Trusted CAs screen and then click Import to open the Trusted CA Import screen. Note: You must remove any spaces from the certificate’s filename before you can import the certificate. Figure 98 Trusted CA Import The following table describes the labels in this screen.
Chapter 13 Certificates 13.2.2 Trusted CA Details Use this screen to view in-depth information about the certification authority’s certificate, change the certificate’s name and set whether or not you want the ZyXEL Device to check a certification authority’s list of revoked certificates before trusting a certificate issued by the certification authority. Click Security > Certificates > Trusted CAs to open the Trusted CAs screen. Click the details icon to open the Trusted CA Details screen.
Chapter 13 Certificates Table 68 Trusted CA Details (continued) LABEL DESCRIPTION Version This field displays the X.509 version number. Serial Number This field displays the certificate’s identification number given by the certification authority. Signature Algorithm This field displays the type of algorithm that was used to sign the certificate. Some certification authorities use rsa-pkcs1-sha1 (RSA public-private key encryption algorithm and the SHA1 hash algorithm).
Chapter 13 Certificates 13.3 Certificates Technical Reference This section provides technical background information about the topics covered in this chapter. 13.3.1 Certificates Overview The ZyXEL Device can use certificates (also called digital IDs) to authenticate users. Certificates are based on public-private key pairs. A certificate contains the certificate owner’s identity and public key. Certificates provide a way to exchange public keys for use in authentication.
Chapter 13 Certificates 236 1 Tim wants to send a message to Jenny. He needs her to be sure that it comes from him, and that the message content has not been altered by anyone else along the way. Tim generates a public key pair (one public key and one private key). 2 Tim keeps the private key and makes the public key openly available. This means that anyone who receives a message seeming to come from Tim can read it and verify whether it is really from him or not.
P ART V Advanced Static Route (239) 802.
CHAPTER 14 Static Route 14.1 Overview The ZyXEL Device usually uses the default gateway to route outbound traffic from computers on the LAN to the Internet. To have the ZyXEL Device send data to devices not reachable through the default gateway, use static routes. For example, the next figure shows a computer (A) connected to the ZyXEL Device’s LAN interface. The ZyXEL Device routes most traffic from A to the Internet through the ZyXEL Device’s default gateway (R1).
Chapter 14 Static Route 14.2 The Static Route Screen Use this screen to view the static route rules. Click Advanced > Static Route to open the Static Route screen. Figure 101 Advanced > Static Route The following table describes the labels in this screen. Table 69 Advanced > Static Route LABEL DESCRIPTION # This is the number of an individual static route. Active This field indicates whether the rule is active or not. Clear the check box to disable the rule. Select the check box to enable it.
Chapter 14 Static Route Table 69 Advanced > Static Route LABEL DESCRIPTION Apply Click this to save your changes. Cancel Click this to restore your previously saved settings. 14.2.1 Static Route Edit Use this screen to configure the required information for a static route. Select a static route index number and click Edit. The screen shown next appears. Figure 102 Advanced > Static Route: Edit The following table describes the labels in this screen.
Chapter 14 Static Route Table 70 Advanced > Static Route: Edit LABEL DESCRIPTION Gateway IP Address This field is available when you select Gateway Address from Gateway Type. Enter the IP address of the gateway. The gateway is a router or switch on the same network segment as the device's LAN or WAN port. The gateway helps forward packets to their destinations. Gateway Node This field is available when you select Gateway Node from Gateway Type. Select a remote node to set the static route.
CHAPTER 15 802.1Q/1P 15.1 Overview This chapter describes how to configure the 802.1Q/1P settings. A Virtual Local Area Network (VLAN) allows a physical network to be partitioned into multiple logical networks. A VLAN group can be treated as an individual device. Each group can have its own rules about where and how to forward traffic. You can assign any ports on the ZyXEL Device to a VLAN group and configure the settings for the group.
Chapter 15 802.1Q/1P IEEE 802.1Q Tagged VLAN Tagged VLAN uses an explicit tag (VLAN ID) in the MAC header to identify the VLAN membership of a frame across bridges - they are not confined to the device on which they were created. The VLAN ID associates a frame with a specific VLAN and provides the information that devices need to process the frame across the network. PVC A virtual circuit is a logical point-to-point circuit between customer sites.
Chapter 15 802.1Q/1P 15.1.3 802.1Q/1P Example This example shows how to configure the 802.1Q/1P settings on the ZyXEL Device. 802.1Q/1P Example P-660HW-Tx 1 1 VoIP Network 2 2 3 4 3 4 Internet - (PPPoE) Internet - (PPPoE) 5 6 7 8 LAN1 and LAN2 are connected to ATAs (Analogue Telephone Adapters) and used for VoIP traffic.
Chapter 15 802.1Q/1P 6 Click Apply. Advanced > 802.1Q/1P > Group Setting > Edit: Example To set a high priority for VoIP traffic, follow these steps. 246 1 Click Advanced > 802.1Q/1P > Port Setting to display the following screen. 2 Type 2 in the 802.1Q PVID column for LAN1, LAN2 and PVC1. 3 Select 7 from the 802.1P Priority drop-down list box for LAN1, LAN2 and PVC1.
Chapter 15 802.1Q/1P 4 Click Apply. Advanced > 802.1Q/1P > Port Setting: Example Ports 3 and 4 are connected to desktop computers and are used for Internet traffic. You want to create low priority for this type of traffic, so you want to group these ports and PVC2 into one VLAN (VLAN3). PVC2 priority is set to low level of service. SSID1 and SSID2 are two wireless networks. You want to create medium priority for this type of traffic, so you want to group these ports and PVC3 into one VLAN (VLAN4).
Chapter 15 802.1Q/1P Follow the same steps as in VLAN2 to configure the settings for VLAN3 and VLAN4. The summary screen should then display as follows. Advanced > 802.1Q/1P > Group Setting: Example This completes the 802.1Q/1P setup.
Chapter 15 802.1Q/1P 15.2 The 802.1Q/1P Group Setting Screen Use this screen to activate 802.1Q/1P and display the VLAN groups. Click Advanced > 802.1Q/1P to display the following screen. Figure 104 Advanced > 802.1Q/1P > Group Setting The following table describes the labels in this screen. Table 71 Advanced > 802.1Q/1P > Group Setting LABEL DESCRIPTION 802.1Q/1P Active Select this check box to activate the 802.1P/1Q feature. Management Vlan ID Enter the ID number of a VLAN group.
Chapter 15 802.1Q/1P Table 71 Advanced > 802.1Q/1P > Group Setting (continued) LABEL DESCRIPTION Name This field displays the name of the VLAN group. VID This field displays the ID number of the VLAN group. Port Number These columns display the VLAN’s settings for each port. A tagged port is marked as T, an untagged port is marked as U and ports not participating in a VLAN are marked as “–“. Modify Click the Edit button to configure the the ports in the VLAN group.
Chapter 15 802.1Q/1P The following table describes the labels in this screen. Table 72 Advanced > 802.1Q/1P > Group Setting > Edit LABEL DESCRIPTION Name Enter a descriptive name for the VLAN group for identification purposes. The text may consist of up to 8 letters, numerals, “-”, “_” and “@”. VLAN ID Assign a VLAN ID for the VLAN group. The valid VID range is between 1 and 4094. Default Gateway Select the default gateway for the VLAN group.
Chapter 15 802.1Q/1P 15.3 The 802.1Q/1P Port Setting Screen Use this screen to configure the PVID and assign traffic priority for each port. Click Advanced > 802.1Q/1P > Port Setting to display the following screen. Figure 106 Advanced > 802.1Q/1P > Port Setting The following table describes the labels in this screen. Table 73 Advanced > 802.1Q/1P > Port Setting 252 LABEL DESCRIPTION Ports This field displays the types of ports available to join the VLAN group. 802.
CHAPTER 16 Quality of Service (QoS) 16.1 Overview Use the QoS screens to set up your ZyXEL Device to use QoS for traffic management. Quality of Service (QoS) refers to both a network’s ability to deliver data with minimum delay, and the networking methods used to control bandwidth. QoS allows the ZyXEL Device to group and prioritize application traffic and fine-tune network performance. Without QoS, all traffic data are equally likely to be dropped when the network is congested.
Chapter 16 Quality of Service (QoS) 16.1.2 What You Need to Know About QoS QoS versus Cos QoS is used to prioritize source-to-destination traffic flows. All packets in the same flow are given the same priority. Class of Service (CoS) is a way of managing traffic in a network by grouping similar types of traffic together and treating each type as a class. You can use CoS to give different priorities to different packet types. CoS technologies include IEEE 802.
Chapter 16 Quality of Service (QoS) these two classes are assigned priority queue based on the internal QoS mapping table on the ZyXEL Device. Figure 107 QoS Example VoIP: Queue 6 DSL 50 Mbps Boss: Queue 5 IP=192.168.1.
Chapter 16 Quality of Service (QoS) Figure 109 QoS Class Example: VoIP -2 Figure 110 QoS Class Example: Boss -1 256 P-660HW-Tx v3 Series User’s Guide
Chapter 16 Quality of Service (QoS) Figure 111 QoS Class Example: Boss -2 P-660HW-Tx v3 Series User’s Guide 257
Chapter 16 Quality of Service (QoS) 16.2 The QoS General Screen Use this screen to enable or disable QoS and have the ZyXEL Device automatically assign priority to traffic according to the IEEE 802.1p priority level, IP precedence and/or packet length. Click Advanced > QoS to open the screen as shown next. Figure 112 Advanced > QoS > General The following table describes the labels in this screen.
Chapter 16 Quality of Service (QoS) Table 74 Advanced > QoS > General LABEL DESCRIPTION Traffic priority will be automatically assigned by These fields are ignored if traffic matches a class you configured in the Class Setup screen. If you select ON and traffic does not match a class configured in the Class Setup screen, the ZyXEL Device assigns priority to unmatched traffic based on the IEEE 802.1p priority level, IP precedence and/or packet length. See Section 16.5.4 on page 267 for more information.
Chapter 16 Quality of Service (QoS) The following table describes the labels in this screen. Table 75 Advanced > QoS > Class Setup LABEL DESCRIPTION Create a new Class Click this to create a new classifier. No This is the number of each classifier. The ordering of the classifiers is important as the classifiers are applied in turn. Active Select the check box to enable this classifier. Name This is the name of the classifier.
Chapter 16 Quality of Service (QoS) 16.3.1 The Class Configuration Screen Use this screen to configure a classifier. Click the Add button or the Edit icon in the Modify field to display the following screen.
Chapter 16 Quality of Service (QoS) See Appendix E on page 411 for a list of commonly-used services. The following table describes the labels in this screen. Table 76 Advanced > QoS > Class Setup: Edit LABEL DESCRIPTION Class Configuration Active Select the check box to enable this classifier. Name The text may consist of up to 20 letters, numerals and any printable character found on a typical English language keyboard. Interface Select from which interface traffic of this class should come.
Chapter 16 Quality of Service (QoS) Table 76 Advanced > QoS > Class Setup: Edit (continued) LABEL DESCRIPTION 802.1Q Tag Select Same to keep the priority setting and VLAN ID of the frames. Select Auto to map the 802.1 priority level to the DSCP value automatically. Select Remove to delete the priority queue tag and VLAN ID of the frames. Select Mark to replace the 802.1 priority field and VLAN ID with the value you set in the fields below.
Chapter 16 Quality of Service (QoS) Table 76 Advanced > QoS > Class Setup: Edit (continued) LABEL MAC Mask DESCRIPTION Type the mask for the specified MAC address to determine which bits a packet’s MAC address should match. Enter “f” for each bit of the specified destination MAC address that the traffic’s MAC address should match. Enter “0“ for the bit(s) of the matched traffic’s MAC address, which can be of any hexadecimal character(s).
Chapter 16 Quality of Service (QoS) 16.4 The QoS Monitor Screen Use this screen to view the ZyXEL Device’s QoS packet statistics. Click Advanced > QoS > Monitor. The screen appears as shown. Figure 115 Advanced > QoS > Monitor The following table describes the labels in this screen. Table 77 Advanced > QoS > Monitor LABEL DESCRIPTION Priority Queue This shows the priority queue number.
Chapter 16 Quality of Service (QoS) 16.5 QoS Technical Reference This section provides some technical background information about the topics covered in this chapter. 16.5.1 IEEE 802.1Q Tag The IEEE 802.1Q standard defines an explicit VLAN tag in the MAC header to identify the VLAN membership of a frame across bridges. A VLAN tag includes the 12-bit VLAN ID and 3-bit user priority.
Chapter 16 Quality of Service (QoS) 16.5.3 DiffServ QoS is used to prioritize source-to-destination traffic flows. All packets in the flow are given the same priority. You can use CoS (class of service) to give different priorities to different packet types. Differentiated Services (DiffServ) is a Class of Service (CoS) model that marks packets so that they receive specific per-hop treatment at DiffServ-compliant network devices along the route based on the application types and traffic flow.
Chapter 16 Quality of Service (QoS) gets through faster while traffic in lower index queues is dropped if the network is congested. Table 79 Internal Layer2 and Layer3 QoS Mapping LAYER 2 LAYER 3 PRIORITY QUEUE IEEE 802.
CHAPTER 17 Dynamic DNS Setup 17.1 Overview Dynamic DNS allows you to update your current dynamic IP address with one or many dynamic DNS services so that anyone can contact you (in NetMeeting, CUSeeMe, etc.). You can also access your FTP server or Web site on your own computer using a domain name (for instance myhost.dhs.org, where myhost is a name of your choice) that will never change instead of using an IP address that changes each time you reconnect.
Chapter 17 Dynamic DNS Setup 17.2 The Dynamic DNS Screen Use this screen to change your ZyXEL Device’s DDNS. Click Advanced > Dynamic DNS. The screen appears as shown. Figure 116 Advanced > Dynamic DNS The following table describes the fields in this screen. Table 80 Advanced > Dynamic DNS LABEL DESCRIPTION Dynamic DNS Setup Active Dynamic DNS Select this check box to use dynamic DNS. Service Provider This is the name of your Dynamic DNS service provider.
Chapter 17 Dynamic DNS Setup Table 80 Advanced > Dynamic DNS (continued) LABEL DESCRIPTION Enable Wildcard Option Select the check box to enable DynDNS Wildcard. Enable off line option This option is available when CustomDNS is selected in the DDNS Type field. Check with your Dynamic DNS service provider to have traffic redirected to a URL (that you can specify) while you are off line.
Chapter 17 Dynamic DNS Setup 272 P-660HW-Tx v3 Series User’s Guide
CHAPTER 18 Remote Management 18.1 Overview Remote management allows you to determine which services/protocols can access which ZyXEL Device interface (if any) from which computers. The following figure shows remote management of the ZyXEL Device coming in from the WAN. Figure 117 Remote Management From the WAN LAN WAN HTTP Telnet Note: When you configure remote management to allow management from the WAN, you still need to configure a firewall rule to allow access.
Chapter 18 Remote Management To disable remote management of a service, select Disable in the corresponding Access Status field. You may only have one remote management session running at a time. The ZyXEL Device automatically disconnects a remote management session of lower priority when another remote management session of higher priority starts. The priorities for the different types of remote management sessions are as follows. 1 Telnet 2 HTTP 18.1.
Chapter 18 Remote Management • There is a firewall rule that blocks it. Remote Management and NAT When NAT is enabled: • Use the ZyXEL Device’s WAN IP address when configuring from the WAN. • Use the ZyXEL Device’s LAN IP address when configuring from the LAN. System Timeout There is a default system management idle timeout of five minutes (three hundred seconds). The ZyXEL Device automatically logs you out if the management session remains idle for longer than this timeout period.
Chapter 18 Remote Management The following table describes the labels in this screen. Table 81 Advanced > Remote Management > WWW LABEL DESCRIPTION Port You may change the server port number for a service, if needed. However, you must use the same port number in order to use that service for remote management. Access Status Select the interface(s) through which a computer may access the ZyXEL Device using this service.
Chapter 18 Remote Management The following table describes the labels in this screen. Table 82 Advanced > Remote Management > Telnet LABEL DESCRIPTION Port You may change the server port number for a service if needed, however you must use the same port number in order to use that service for remote management. Access Status Select the interface(s) through which a computer may access the ZyXEL Device using this service.
Chapter 18 Remote Management The following table describes the labels in this screen. Table 83 Advanced > Remote Management > FTP LABEL DESCRIPTION Port You may change the server port number for a service, if needed. However, you must use the same port number in order to use that service for remote management. Access Status Select the interface(s) through which a computer may access the ZyXEL Device using this service.
Chapter 18 Remote Management The following table describes the labels in this screen. Table 84 Advanced > Remote Management > DNS LABEL DESCRIPTION Port The DNS service port number is 53 and cannot be changed here. Access Status Select the interface(s) through which a computer may send DNS queries to the ZyXEL Device. Secured Client IP A secured client is a “trusted” computer that is allowed to send DNS queries to the ZyXEL Device.
Chapter 18 Remote Management The following table describes the labels in this screen. Table 85 Advanced > Remote Management > ICMP LABEL DESCRIPTION ICMP Internet Control Message Protocol is a message control and errorreporting protocol between a host server and a gateway to the Internet. ICMP uses Internet Protocol (IP) datagrams, but the messages are processed by the TCP/IP software and directly apparent to the application user.
CHAPTER 19 Universal Plug-and-Play (UPnP) 19.1 Overview Universal Plug and Play (UPnP) is a distributed, open networking standard that uses TCP/IP for simple peer-to-peer network connectivity between devices. A UPnP device can dynamically join a network, obtain an IP address, convey its capabilities and learn about other devices on the network. In turn, a device can leave a network smoothly and automatically when it is no longer in use. 19.1.
Chapter 19 Universal Plug-and-Play (UPnP) Windows Messenger is an example of an application that supports NAT traversal and UPnP. See the NAT chapter for more information on NAT. Cautions with UPnP The automated nature of NAT traversal applications in establishing their own services and opening firewall ports may present network security issues. Network information and configuration may also be obtained and modified by users in some network environments.
Chapter 19 Universal Plug-and-Play (UPnP) 19.2 The UPnP Screen Use the following screen to configure the UPnP settings on your ZyXEL Device. Click Advanced > UPnP to display the screen shown next. See Section 19.1 on page 281 for more information. Figure 123 Advanced > UPnP > General The following table describes the fields in this screen. Table 86 Advanced > UPnP > General LABEL DESCRIPTION Active the Universal Plug and Play (UPnP) Feature Select this check box to activate UPnP.
Chapter 19 Universal Plug-and-Play (UPnP) 19.3 Installing UPnP in Windows Example This section shows how to install UPnP in Windows Me and Windows XP. Installing UPnP in Windows Me Follow the steps below to install the UPnP in Windows Me. 1 Click Start and Control Panel. Double-click Add/Remove Programs. 2 Click on the Windows Setup tab and select Communication in the Components selection box. Click Details.
Chapter 19 Universal Plug-and-Play (UPnP) 3 In the Communications window, select the Universal Plug and Play check box in the Components selection box. Add/Remove Programs: Windows Setup: Communication: Components 4 Click OK to go back to the Add/Remove Programs Properties window and click Next. 5 Restart the computer when prompted. Installing UPnP in Windows XP Follow the steps below to install the UPnP in Windows XP. 1 Click Start and Control Panel. 2 Double-click Network Connections.
Chapter 19 Universal Plug-and-Play (UPnP) 3 In the Network Connections window, click Advanced in the main menu and select Optional Networking Components …. Network Connections 4 The Windows Optional Networking Components Wizard window displays. Select Networking Service in the Components selection box and click Details.
Chapter 19 Universal Plug-and-Play (UPnP) 5 In the Networking Services window, select the Universal Plug and Play check box. Networking Services 6 Click OK to go back to the Windows Optional Networking Component Wizard window and click Next. 19.4 Using UPnP in Windows XP Example This section shows you how to use the UPnP feature in Windows XP. You must already have UPnP installed in Windows XP and UPnP activated on the ZyXEL Device. Make sure the computer is connected to a LAN port of the ZyXEL Device.
Chapter 19 Universal Plug-and-Play (UPnP) 2 Right-click the icon and select Properties. Network Connections 3 In the Internet Connection Properties window, click Settings to see the port mappings there were automatically created.
Chapter 19 Universal Plug-and-Play (UPnP) 4 You may edit or delete the port mappings or click Add to manually add port mappings. Internet Connection Properties: Advanced Settings Internet Connection Properties: Advanced Settings: Add 5 When the UPnP-enabled device is disconnected from your computer, all port mappings will be deleted automatically.
Chapter 19 Universal Plug-and-Play (UPnP) 6 Select Show icon in notification area when connected option and click OK. An icon displays in the system tray. System Tray Icon 7 Double-click on the icon to display your current Internet connection status. Internet Connection Status Web Configurator Easy Access With UPnP, you can access the web-based configurator on the ZyXEL Device without finding out the IP address of the ZyXEL Device first.
Chapter 19 Universal Plug-and-Play (UPnP) 3 Select My Network Places under Other Places. Network Connections 4 An icon with the description for each UPnP-enabled device displays under Local Network.
Chapter 19 Universal Plug-and-Play (UPnP) 5 Right-click on the icon for your ZyXEL Device and select Invoke. The web configurator login screen displays. Network Connections: My Network Places 6 Right-click on the icon for your ZyXEL Device and select Properties. A properties window displays with basic information about the ZyXEL Device.
P ART VI Maintenance System Settings (295) Logs (301) Tools (315) Diagnostic (329) 293
CHAPTER 20 System Settings 20.1 Overview This chapter shows you how to configure system related settings, such as system time, password, name, the domain name and the inactivity timeout interval. 20.1.1 What You Can Do in the System Settings Screens • Use the General screen (Section 20.2 on page 296) to configure system settings. • Use the Time Setting screen (Section 20.3 on page 298) to set the system time. 20.1.
Chapter 20 System Settings 20.2 The General Screen Use this screen to configure system settings such as the system and domain name, inactivity timeout interval and system password. The System Name is for identification purposes. However, because some ISPs check this name you should enter your computer's "Computer Name". Find the system name of your Windows computer by following one of the steps below. • In Windows 95/98 click Start, Settings, Control Panel, Network.
Chapter 20 System Settings The following table describes the labels in this screen. Table 87 Maintenance > System > General LABEL DESCRIPTION System Setup System Name Choose a descriptive name for identification purposes. It is recommended you enter your computer’s “Computer name” in this field. This name can be up to 30 alphanumeric characters long. Spaces are not allowed, but dashes “-” and underscores "_" are accepted. Domain Name Enter the domain name (if you know it) here.
Chapter 20 System Settings 20.3 The Time Setting Screen Use this screen to configure the ZyXEL Device’s time based on your local time zone. To change your ZyXEL Device’s time and date, click Maintenance > System > Time Setting. The screen appears as shown. Figure 125 Maintenance > System > Time Setting The following table describes the fields in this screen. Table 88 Maintenance > System > Time Setting LABEL DESCRIPTION Current Time Current Time This field displays the time of your ZyXEL Device.
Chapter 20 System Settings Table 88 Maintenance > System > Time Setting (continued) LABEL DESCRIPTION New Time This field displays the last updated time from the time server or the last time configured manually. (hh:mm:ss) When you set Time and Date Setup to Manual, enter the new time in this field and then click Apply. New Date (yyyy/mm/dd) This field displays the last updated date from the time server or the last date configured manually.
Chapter 20 System Settings Table 88 Maintenance > System > Time Setting (continued) LABEL DESCRIPTION End Date Configure the day and time when Daylight Saving Time ends if you selected Enable Daylight Saving. The o'clock field uses the 24 hour format. Here are a couple of examples: Daylight Saving Time ends in the United States on the first Sunday of November. Each time zone in the United States stops using Daylight Saving Time at 2 A.M. local time.
CHAPTER 21 Logs 21.1 Overview This chapter contains information about configuring general log settings and viewing the ZyXEL Device’s logs. The web configurator allows you to choose which categories of events and/or alerts to have the ZyXEL Device log and then display the logs or have the ZyXEL Device send them to an administrator (as e-mail) or to a syslog server. 21.1.1 What You Can Do in the Log Screens • Use the View Log screen (Section 21.
Chapter 21 Logs 21.2 The View Log Screen Use the View Log screen to see the logs for the categories that you selected in the Log Settings screen (see Section 21.3 on page 303). Click Maintenance > Logs to open the View Log screen. Entries in red indicate alerts. The log wraps around and deletes the old entries after it fills. Click a column heading to sort the entries. A triangle indicates ascending or descending sort order.
Chapter 21 Logs Table 89 Maintenance > Logs > View Log LABEL DESCRIPTION Destination This field lists the destination IP address and the port number of the incoming packet. Notes This field displays additional information about the log entry. 21.3 The Log Settings Screen Use the Log Settings screen to configure the mail server, the syslog server, when to send logs and what logs to send. To change your ZyXEL Device’s log settings, click Maintenance > Logs > Log Settings. The screen appears as shown.
Chapter 21 Logs The following table describes the fields in this screen. Table 90 Maintenance > Logs > Log Settings LABEL DESCRIPTION E-mail Log Settings Mail Server Enter the server name or the IP address of the mail server for the e-mail addresses specified below. If this field is left blank, logs and alert messages will not be sent via E-mail. Mail Subject Type a title that you want to be in the subject line of the log e-mail message that the ZyXEL Device sends.
Chapter 21 Logs Table 90 Maintenance > Logs > Log Settings LABEL DESCRIPTION Send Immediate Alert Select log categories for which you want the ZyXEL Device to send E-mail alerts immediately. Apply Click this to save your customized settings and exit this screen. Cancel Click this to restore your previously saved settings. 21.4 SMTP Error Messages If there are difficulties in sending e-mail the following error message appears. “SMTP action request failed. ret= ??".
Chapter 21 Logs • "End of Log" message shows that a complete log has been sent. Figure 128 E-mail Log Example Subject: Firewall Alert From Date: Fri, 07 Apr 2000 10:05:42 From: user@zyxel.com To: user@zyxel.com 1|Apr 7 00 |From:192.168.1.1 To:192.168.1.255 |default policy |forward | 09:54:03 |UDP src port:00520 dest port:00520 |<1,00> | 2|Apr 7 00 |From:192.168.1.131 To:192.168.1.255 |default policy |forward | 09:54:17 |UDP src port:00520 dest port:00520 |<1,00> | 3|Apr 7 00 |From:192.168.1.6 To:10.10.10.
Chapter 21 Logs Table 92 System Maintenance Logs (continued) LOG MESSAGE DESCRIPTION FTP login failed Someone has failed to log on to the router via ftp. NAT Session Table is Full! The maximum number of NAT session table entries has been exceeded and the table is full. Starting Connectivity Monitor Starting Connectivity Monitor. Time initialized by Daytime Server The router got the time and date from the Daytime server.
Chapter 21 Logs Table 94 Access Control Logs LOG MESSAGE DESCRIPTION Firewall default policy: [ TCP | UDP | IGMP | ESP | GRE | OSPF ] Attempted TCP/UDP/IGMP/ESP/GRE/OSPF access matched the default policy and was blocked or forwarded according to the default policy’s setting.
Chapter 21 Logs Table 95 TCP Reset Logs (continued) LOG MESSAGE DESCRIPTION Exceed MAX incomplete, sent TCP RST The router sent a TCP reset packet when the number of incomplete connections (TCP and UDP) exceeded the user-configured threshold. (Incomplete count is for all TCP and UDP connections through the firewall.
Chapter 21 Logs Table 98 CDR Logs LOG MESSAGE DESCRIPTION board %d line %d channel %d, call %d, %s C01 Outgoing Call dev=%x ch=%x %s The router received the setup requirements for a call. “call” is the reference (count) number of the call. “dev” is the device type (3 is for dial-up, 6 is for PPPoE, 10 is for PPTP). "channel" or “ch” is the call channel ID.For example,"board 0 line 0 channel 0, call 3, C01 Outgoing Call dev=6 ch=0 "Means the router has dialed to the PPPoE server 3 times.
Chapter 21 Logs For type and code details, see Table 105 on page 312. Table 102 Attack Logs LOG MESSAGE DESCRIPTION attack [ TCP | UDP | IGMP | ESP | GRE | OSPF ] The firewall detected a TCP/UDP/IGMP/ESP/GRE/OSPF attack. attack ICMP (type:%d, code:%d) The firewall detected an ICMP attack. land [ TCP | UDP | IGMP | ESP | GRE | OSPF ] The firewall detected a TCP/UDP/IGMP/ESP/GRE/OSPF land attack. land ICMP (type:%d, code:%d) The firewall detected an ICMP land attack.
Chapter 21 Logs Table 103 802.1X Logs (continued) LOG MESSAGE DESCRIPTION User logout because of user deassociation. The router logged out a user who ended the session. User logout because of no authentication response from user. The router logged out a user from which there was no authentication response. User logout because of idle timeout expired. The router logged out a user whose idle timeout period expired. User logout because of user request. A user logged out. No response from RADIUS.
Chapter 21 Logs Table 105 ICMP Notes (continued) TYPE CODE DESCRIPTION Source Quench 4 0 A gateway may discard internet datagrams if it does not have the buffer space needed to queue the datagrams for output to the next network on the route to the destination network.
Chapter 21 Logs The following table shows RFC-2408 ISAKMP payload types that the log displays. Please refer to RFC 2408 for detailed information on each type.
CHAPTER 22 Tools 22.1 Overview This chapter explains how to upload new firmware, manage configuration files and restart your ZyXEL Device. Use the instructions in this chapter to change the device’s configuration file or upgrade its firmware. After you configure your device, you can backup the configuration file to a computer. That way if you later misconfigure the device, you can upload the backed up configuration file to return to your previous settings.
Chapter 22 Tools 22.1.2 What You Need To Know About Tools Filename Conventions The configuration file (often called the romfile or rom-0) contains the factory default settings in the menus such as password, DHCP Setup, TCP/IP Setup, etc. It arrives from ZyXEL with a “rom” filename extension. Once you have customized the ZyXEL Device's settings, they can be saved back to your computer under a filename of your choosing.
Chapter 22 Tools FTP Restrictions FTP will not work when: 1 The firewall is active (turn the firewall off or create a firewall rule to allow access from the WAN). 2 You have disabled the FTP service in the Remote Management screen. 3 The IP you entered in the Secured Client IP field does not match the client IP. If it does not match, the device will disallow the FTP session. 22.1.
Chapter 22 Tools Restore Using FTP Session Example Figure 129 Restore Using FTP Session Example ftp> put config.rom rom-0 200 Port command okay 150 Opening data connection for STOR rom-0 226 File received OK 221 Goodbye for writing flash ftp: 16384 bytes sent in 0.06Seconds 273.07Kbytes/sec. ftp>quit Refer to Section 22.1.2 on page 316 to read about configurations that disallow TFTP and FTP over WAN.
Chapter 22 Tools FTP Session Example of Firmware File Upload Figure 130 FTP Session Example of Firmware File Upload 331 Enter PASS command Password: 230 Logged in ftp> bin 200 Type I OK ftp> put firmware.bin ras 200 Port command okay 150 Opening data connection for STOR ras 226 File received OK ftp: 1103936 bytes sent in 1.10Seconds 297.89Kbytes/sec. ftp> quit More commands (found in GUI-based FTP clients) are listed in this chapter. Refer to Section 22.1.
Chapter 22 Tools UNIX, use “get” to transfer from the device to the computer, “put” the other way around, and “binary” to set binary transfer mode. TFTP Upload Command Example The following is an example TFTP command: tftp [-i] host put firmware.bin ras Where “i” specifies binary image transfer mode (use this mode when transferring binary files), “host” is the device’s IP address, “put” transfers the file source on the computer (firmware.
Chapter 22 Tools FTP Command Configuration Backup Example This figure gives an example of using FTP commands from the DOS command prompt to save your device’s configuration onto your computer. Figure 131 FTP Session Example 331 Enter PASS command Password: 230 Logged in ftp> bin 200 Type I OK ftp> get rom-0 zyxel.rom 200 Port command okay 150 Opening data connection for STOR ras 226 File received OK ftp: 16384 bytes sent in 1.10Seconds 297.89Kbytes/sec.
Chapter 22 Tools 1 Use telnet from your computer to connect to the ZyXEL Device and log in. Because TFTP does not have any security checks, the ZyXEL Device records the IP address of the telnet client and accepts TFTP requests only from this address. 2 Enter command “sys stdio 0” to disable the management idle timeout, so the TFTP transfer will not be interrupted. Enter command “sys stdio 5” to restore the five-minute management idle timeout (default) when the file transfer is complete.
Chapter 22 Tools Table 110 General Commands for GUI-based TFTP Clients (continued) COMMAN D DESCRIPTION Binary Transfer the file in binary mode. Abort Stop transfer of the file. Refer to Section 22.1.2 on page 316 to read about configurations that disallow TFTP and FTP over WAN. 22.2 The Firmware Screen Click Maintenance > Tools to open the Firmware screen. Follow the instructions in this screen to upload firmware to your ZyXEL Device.
Chapter 22 Tools Table 111 Maintenance > Tools > Firmware (continued) LABEL DESCRIPTION Browse... Click this to find the .bin file you want to upload. Remember that you must decompress compressed (.zip) files before you can upload them. Upload Click this to begin the upload process. This process may take up to two minutes. After you see the Firmware Upload in Progress screen, wait two minutes before logging into the ZyXEL Device again.
Chapter 22 Tools If the upload was not successful, the following screen will appear. Click Return to go back to the Firmware screen. Figure 135 Error Message 22.3 The Configuration Screen See Section 22.1.4 on page 317 for transferring configuration files using FTP/TFTP commands. Click Maintenance > Tools > Configuration. Information related to factory defaults, backup configuration, and restoring configuration appears in this screen, as shown next.
Chapter 22 Tools Backup Configuration Backup Configuration allows you to back up (save) the ZyXEL Device’s current configuration to a file on your computer. Once your ZyXEL Device is configured and functioning properly, it is highly recommended that you back up your configuration file before making configuration changes. The backup configuration file will be useful in case you need to return to your previous settings. Click Backup to save the ZyXEL Device’s current configuration to your computer.
Chapter 22 Tools The ZyXEL Device automatically restarts in this time causing a temporary network disconnect. In some operating systems, you may see the following icon on your desktop. Figure 138 Network Temporarily Disconnected If you uploaded the default configuration file you may need to change the IP address of your computer to be in the same subnet as that of the default device IP address (192.168.1.1). See Appendix A on page 351 for details on how to set up your computer’s IP address.
Chapter 22 Tools Reset to Factory Defaults Click the Reset button to clear all user-entered configuration information and return the ZyXEL Device to its factory defaults. The following warning screen appears. Figure 140 Reset Warning Message Figure 141 Reset In Process Message You can also press the RESET button on the rear panel to reset the factory defaults of your ZyXEL Device. Refer to Section 1.6 on page 27 for more information on the RESET button. 22.
CHAPTER 23 Diagnostic 23.1 Overview These read-only screens display information to help you identify problems with the ZyXEL Device. 23.1.1 What You Can Do in the Diagnostic Screens • Use the General Diagnostic screen (Section 23.2 on page 329) to ping an IP address. • Use the DSL Line Diagnostic screen (Section 23.3 on page 330) to view the DSL line statistics and reset the ADSL line. 23.2 The General Diagnostic Screen Use this screen to ping an IP address.
Chapter 23 Diagnostic The following table describes the fields in this screen. Table 113 Maintenance > Diagnostic > General LABEL DESCRIPTION TCP/IP Address Type the IP address of a computer that you want to ping in order to test a connection. Ping Click this to ping the IP address that you entered. 23.3 The DSL Line Diagnostic Screen Use this screen to view the DSL line statistics and reset the ADSL line. Click Maintenance > Diagnostic > DSL Line to open the screen shown next.
Chapter 23 Diagnostic The following table describes the fields in this screen. Table 114 Maintenance > Diagnostic > DSL Line LABEL DESCRIPTION ATM Status Click this to view your DSL connection’s Asynchronous Transfer Mode (ATM) statistics. ATM is a networking technology that provides highspeed data transfer. ATM uses fixed-size packets of information called cells. With ATM, a high QoS (Quality of Service) can be guaranteed. The (Segmentation and Reassembly) SAR driver translates packets into ATM cells.
Chapter 23 Diagnostic Table 114 Maintenance > Diagnostic > DSL Line (continued) LABEL DESCRIPTION DSL Line Status Click this to view statistics about the DSL connections. noise margin downstream is the signal to noise ratio for the downstream part of the connection (coming into the ZyXEL Device from the ISP). It is measured in decibels. The higher the number the more signal and less noise there is.
P ART VII Troubleshooting and Specifications Troubleshooting (335) Product Specifications (341) 333
CHAPTER 24 Troubleshooting This chapter offers some suggestions to solve problems you might encounter. The potential problems are divided into the following categories. • Power, Hardware Connections, and LEDs • ZyXEL Device Access and Login • Internet Access 24.1 Power, Hardware Connections, and LEDs The ZyXEL Device does not turn on. None of the LEDs turn on. 1 Make sure the ZyXEL Device is turned on. 2 Make sure you are using the power adaptor or cord included with the ZyXEL Device.
Chapter 24 Troubleshooting 2 Check the hardware connections. 3 Inspect your cables for damage. Contact the vendor to replace any damaged cables. 4 Turn the ZyXEL Device off and on. 5 If the problem continues, contact the vendor. 24.2 ZyXEL Device Access and Login I forgot the IP address for the ZyXEL Device. 1 The default IP address is 192.168.1.1.
Chapter 24 Troubleshooting • If you changed the IP address (Section 7.2 on page 121), use the new IP address. • If you changed the IP address and have forgotten it, see the troubleshooting suggestions for I forgot the IP address for the ZyXEL Device. 2 Check the hardware connections, and make sure the LEDs are behaving as expected. See the Quick Start Guide. 3 Make sure your Internet browser does not block pop-up windows and has JavaScript and Java enabled. See Appendix B on page 375.
Chapter 24 Troubleshooting 3 Turn the ZyXEL Device off and on. 4 If this does not work, you have to reset the device to its factory defaults. See Section 24.1 on page 335. I cannot Telnet to the ZyXEL Device. See the troubleshooting suggestions for I cannot see or access the Login screen in the web configurator. Ignore the suggestions about your browser. I cannot use FTP to upload / download the configuration file. / I cannot use FTP to upload new firmware.
Chapter 24 Troubleshooting I cannot access the Internet anymore. I had access to the Internet (with the ZyXEL Device), but my Internet connection is not available anymore. 1 Check the hardware connections, and make sure the LEDs are behaving as expected. See the Quick Start Guide and Section 1.5 on page 26. 2 Turn the ZyXEL Device off and on. 3 If the problem continues, contact your ISP. The Internet connection is slow or intermittent. 1 There might be a lot of traffic on the network.
Chapter 24 Troubleshooting 340 P-660HW-Tx v3 Series User’s Guide
CHAPTER 25 Product Specifications The following tables summarize the ZyXEL Device’s hardware and firmware features. 25.
Chapter 25 Product Specifications Table 116 Firmware Specifications (continued) Default User Password user Default Admin Password 1234 DHCP Server IP Pool 192.168.1.32 to 192.168.1.64 Static DHCP Addresses 10 Content Filtering Web page blocking by URL keyword. Static Routes 16 Device Management Use the web configurator to easily configure the rich range of features on the ZyXEL Device. Wireless Functionality Allow the IEEE 802.11b and/or IEEE 802.
Chapter 25 Product Specifications Table 116 Firmware Specifications (continued) Universal Plug and Play (UPnP) A UPnP-enabled device can dynamically join a network, obtain an IP address and convey its capabilities to other devices on the network. Firewall Your device has a stateful inspection firewall with DoS (Denial of Service) protection. By default, when the firewall is activated, all incoming traffic from the WAN to the LAN is blocked unless it is initiated from the LAN.
Chapter 25 Product Specifications Table 116 Firmware Specifications (continued) ADSL Standards ANSI T1.413, Issue 2; G.dmt (G.992.1) ADSL2 G.dmt.bis (G.992.3) ADSL2+ (G.992.5) Reach-Extended ADSL (RE ADSL) SRA (Seamless Rate Adaptation) Auto-negotiating rate adaptation ADSL physical connection ATM AAL5 (ATM Adaptation Layer type 5) Multi-protocol over AAL5 (RFC2684/1483) PPP over ATM AAL5 (RFC2364) PPP over Ethernet for DSL connection (RFC2516) VC-based and LLC-based multiplexing I.
Chapter 25 Product Specifications 25.3 Wireless Features Table 117 Wireless Features External Antenna The ZyXEL Device is equipped with one fixed antenna to provide a clear radio signal between the wireless stations and the access points. Wireless LAN MAC Address Filtering Your device can check the MAC addresses of wireless stations against a list of allowed or denied MAC addresses.
Chapter 25 Product Specifications The following list, which is not exhaustive, illustrates the standards supported in the ZyXEL Device. Table 118 Standards Supported STANDARD DESCRIPTION RFC 867 Daytime Protocol RFC 868 Time Protocol.
Chapter 25 Product Specifications Table 118 Standards Supported (continued) STANDARD DESCRIPTION Microsoft PPTP MS PPTP (Microsoft's implementation of Point to Point Tunneling Protocol) MBM v2 Media Bandwidth Management v2 RFC 2383 ST2+ over ATM Protocol Specification - UNI 3.1 Version TR-069 TR-069 DSL Forum Standard for CPE Wan Management. 1.363.5 Compliant AAL5 SAR (Segmentation And Re-assembly) 25.
Chapter 25 Product Specifications 348 P-660HW-Tx v3 Series User’s Guide
P ART VIII Appendices and Index Note: The appendices provide general information. Some details may not apply to your ZyXEL Device.
APPENDIX A Setting up Your Computer’s IP Address All computers must have a 10M or 100M Ethernet adapter card and TCP/IP installed. Windows 95/98/Me/NT/2000/XP/Vista, Macintosh OS 7 and later operating systems and all versions of UNIX/LINUX include the software components you need to install and use TCP/IP on your computer. Windows 3.1 requires the purchase of a third-party TCP/IP application package.
Appendix A Setting up Your Computer’s IP Address Windows 95/98/Me Click Start, Settings, Control Panel and double-click the Network icon to open the Network window. Figure 145 WIndows 95/98/Me: Network: Configuration Installing Components The Network window Configuration tab displays a list of installed components. You need a network adapter, the TCP/IP protocol and Client for Microsoft Networks. If you need the adapter: 1 In the Network window, click Add. 2 Select Adapter and then click Add.
Appendix A Setting up Your Computer’s IP Address 3 Select Microsoft from the list of manufacturers. 4 Select TCP/IP from the list of network protocols and then click OK. If you need Client for Microsoft Networks: 1 Click Add. 2 Select Client and then click Add. 3 Select Microsoft from the list of manufacturers. 4 Select Client for Microsoft Networks from the list of network clients and then click OK. 5 Restart your computer so the changes you made take effect.
Appendix A Setting up Your Computer’s IP Address 3 Click the DNS Configuration tab. • If you do not know your DNS information, select Disable DNS. • If you know your DNS information, select Enable DNS and type the information in the fields below (you may not need to fill them all in). Figure 147 Windows 95/98/Me: TCP/IP Properties: DNS Configuration 4 Click the Gateway tab. • If you do not know your gateway’s IP address, remove previously installed gateways.
Appendix A Setting up Your Computer’s IP Address Windows 2000/NT/XP The following example figures use the default Windows XP GUI theme. 1 Click start (Start in Windows 2000/NT), Settings, Control Panel. Figure 148 Windows XP: Start Menu 2 In the Control Panel, double-click Network Connections (Network and Dialup Connections in Windows 2000/NT).
Appendix A Setting up Your Computer’s IP Address 3 Right-click Local Area Connection and then click Properties. Figure 150 Windows XP: Control Panel: Network Connections: Properties 4 Select Internet Protocol (TCP/IP) (under the General tab in Win XP) and then click Properties. Figure 151 Windows XP: Local Area Connection Properties 5 356 The Internet Protocol TCP/IP Properties window opens (the General tab in Windows XP).
Appendix A Setting up Your Computer’s IP Address • If you have a dynamic IP address click Obtain an IP address automatically. • If you have a static IP address click Use the following IP Address and fill in the IP address, Subnet mask, and Default gateway fields. • Click Advanced. Figure 152 Windows XP: Internet Protocol (TCP/IP) Properties 6 If you do not know your gateway's IP address, remove any previously installed gateways in the IP Settings tab and click OK.
Appendix A Setting up Your Computer’s IP Address • Click OK when finished. Figure 153 Windows XP: Advanced TCP/IP Properties 7 In the Internet Protocol TCP/IP Properties window (the General tab in Windows XP): • Click Obtain DNS server address automatically if you do not know your DNS server IP address(es). • If you know your DNS server IP address(es), click Use the following DNS server addresses, and type them in the Preferred DNS server and Alternate DNS server fields.
Appendix A Setting up Your Computer’s IP Address If you have previously configured DNS servers, click Advanced and then the DNS tab to order them. Figure 154 Windows XP: Internet Protocol (TCP/IP) Properties 8 Click OK to close the Internet Protocol (TCP/IP) Properties window. 9 Click Close (OK in Windows 2000/NT) to close the Local Area Connection Properties window. 10 Close the Network Connections window (Network and Dial-up Connections in Windows 2000/NT).
Appendix A Setting up Your Computer’s IP Address 1 Click the Start icon, Control Panel. Figure 155 Windows Vista: Start Menu 2 In the Control Panel, double-click Network and Internet. Figure 156 Windows Vista: Control Panel 3 Click Network and Sharing Center.
Appendix A Setting up Your Computer’s IP Address 4 Click Manage network connections. Figure 158 Windows Vista: Network and Sharing Center 5 Right-click Local Area Connection and then click Properties. Note: During this procedure, click Continue whenever Windows displays a screen saying that it needs your permission to continue.
Appendix A Setting up Your Computer’s IP Address 6 Select Internet Protocol Version 4 (TCP/IPv4) and click Properties. Figure 160 Windows Vista: Local Area Connection Properties 7 The Internet Protocol Version 4 (TCP/IPv4) Properties window opens (the General tab). • If you have a dynamic IP address click Obtain an IP address automatically. • If you have a static IP address click Use the following IP address and fill in the IP address, Subnet mask, and Default gateway fields.
Appendix A Setting up Your Computer’s IP Address • Click Advanced. Figure 161 Windows Vista: Internet Protocol Version 4 (TCP/IPv4) Properties 8 If you do not know your gateway's IP address, remove any previously installed gateways in the IP Settings tab and click OK. Do one or more of the following if you want to configure additional IP addresses: • In the IP Settings tab, in IP addresses, click Add.
Appendix A Setting up Your Computer’s IP Address • Click OK when finished. Figure 162 Windows Vista: Advanced TCP/IP Properties 9 In the Internet Protocol Version 4 (TCP/IPv4) Properties window, (the General tab): • Click Obtain DNS server address automatically if you do not know your DNS server IP address(es). • If you know your DNS server IP address(es), click Use the following DNS server addresses, and type them in the Preferred DNS server and Alternate DNS server fields.
Appendix A Setting up Your Computer’s IP Address If you have previously configured DNS servers, click Advanced and then the DNS tab to order them. Figure 163 Windows Vista: Internet Protocol Version 4 (TCP/IPv4) Properties 10 Click OK to close the Internet Protocol Version 4 (TCP/IPv4) Properties window. 11 Click Close to close the Local Area Connection Properties window. 12 Close the Network Connections window. 13 Turn on your ZyXEL Device and restart your computer (if prompted).
Appendix A Setting up Your Computer’s IP Address Macintosh OS 8/9 1 Click the Apple menu, Control Panel and double-click TCP/IP to open the TCP/ IP Control Panel.
Appendix A Setting up Your Computer’s IP Address 2 Select Ethernet built-in from the Connect via list. Figure 165 Macintosh OS 8/9: TCP/IP 3 For dynamically assigned settings, select Using DHCP Server from the Configure: list. 4 For statically assigned settings, do the following: • From the Configure box, select Manually. • Type your IP address in the IP Address box. • Type your subnet mask in the Subnet mask box. • Type the IP address of your ZyXEL Device in the Router address box.
Appendix A Setting up Your Computer’s IP Address Macintosh OS X 1 Click the Apple menu, and click System Preferences to open the System Preferences window. Figure 166 Macintosh OS X: Apple Menu 2 Click Network in the icon bar. • Select Automatic from the Location list. • Select Built-in Ethernet from the Show list. • Click the TCP/IP tab. 3 For dynamically assigned settings, select Using DHCP from the Configure list.
Appendix A Setting up Your Computer’s IP Address • From the Configure box, select Manually. • Type your IP address in the IP Address box. • Type your subnet mask in the Subnet mask box. • Type the IP address of your ZyXEL Device in the Router address box. 5 Click Apply Now and close the window. 6 Turn on your ZyXEL Device and restart your computer (if prompted). Verifying Settings Check your TCP/IP properties in the Network window.
Appendix A Setting up Your Computer’s IP Address 2 Double-click on the profile of the network card you wish to configure. The Ethernet Device General screen displays as shown. Figure 169 Red Hat 9.0: KDE: Ethernet Device: General • If you have a dynamic IP address, click Automatically obtain IP address settings with and select dhcp from the drop down list. • If you have a static IP address, click Statically set IP Addresses and fill in the Address, Subnet mask, and Default Gateway Address fields.
Appendix A Setting up Your Computer’s IP Address 6 Click the Activate button to apply the changes. The following screen displays. Click Yes to save the changes in all screens. Figure 171 Red Hat 9.0: KDE: Network Configuration: Activate 7 After the network card restart process is complete, make sure the Status is Active in the Network Configuration screen. Using Configuration Files Follow the steps below to edit the network configuration files and set your computer IP address.
Appendix A Setting up Your Computer’s IP Address • If you have a static IP address, enter static in the BOOTPROTO= field. Type IPADDR= followed by the IP address (in dotted decimal notation) and type NETMASK= followed by the subnet mask. The following example shows an example where the static IP address is 192.168.1.10 and the subnet mask is 255.255.255.0. Figure 173 Red Hat 9.0: Static IP Address Setting in ifconfig-eth0 DEVICE=eth0 ONBOOT=yes BOOTPROTO=static IPADDR=192.168.1.10 NETMASK=255.255.255.
Appendix A Setting up Your Computer’s IP Address Verifying Settings Enter ifconfig in a terminal screen to check your TCP/IP properties. Figure 176 Red Hat 9.0: Checking TCP/IP Properties [root@localhost]# ifconfig eth0 Link encap:Ethernet HWaddr 00:50:BA:72:5B:44 inet addr:172.23.19.129 Bcast:172.23.19.255 Mask:255.255.255.
Appendix A Setting up Your Computer’s IP Address 374 P-660HW-Tx v3 Series User’s Guide
APPENDIX B Pop-up Windows, JavaScript and Java Permissions In order to use the web configurator you need to allow: • Web browser pop-up windows from your device. • JavaScript (enabled by default). • Java permissions (enabled by default). Note: Internet Explorer 6 screens are used here. Screens for other Internet Explorer versions may vary. Internet Explorer Pop-up Blockers You may have to disable pop-up blocking to log into your device.
Appendix B Pop-up Windows, JavaScript and Java Permissions 1 In Internet Explorer, select Tools, Internet Options, Privacy. 2 Clear the Block pop-ups check box in the Pop-up Blocker section of the screen. This disables any web pop-up blockers you may have enabled. Figure 178 Internet Options: Privacy 3 Click Apply to save this setting. Enable Pop-up Blockers with Exceptions Alternatively, if you only want to allow pop-up windows from your device, see the following steps.
Appendix B Pop-up Windows, JavaScript and Java Permissions 2 Select Settings…to open the Pop-up Blocker Settings screen. Figure 179 Internet Options: Privacy 3 Type the IP address of your device (the web page that you do not want to have blocked) with the prefix “http://”. For example, http://192.168.167.1.
Appendix B Pop-up Windows, JavaScript and Java Permissions 4 Click Add to move the IP address to the list of Allowed sites. Figure 180 Pop-up Blocker Settings 5 Click Close to return to the Privacy screen. 6 Click Apply to save this setting. JavaScript If pages of the web configurator do not display properly in Internet Explorer, check that JavaScript are allowed.
Appendix B Pop-up Windows, JavaScript and Java Permissions 1 In Internet Explorer, click Tools, Internet Options and then the Security tab. Figure 181 Internet Options: Security 2 Click the Custom Level... button. 3 Scroll down to Scripting. 4 Under Active scripting make sure that Enable is selected (the default). 5 Under Scripting of Java applets make sure that Enable is selected (the default).
Appendix B Pop-up Windows, JavaScript and Java Permissions 6 Click OK to close the window. Figure 182 Security Settings - Java Scripting Java Permissions 380 1 From Internet Explorer, click Tools, Internet Options and then the Security tab. 2 Click the Custom Level... button. 3 Scroll down to Microsoft VM. 4 Under Java permissions make sure that a safety level is selected.
Appendix B Pop-up Windows, JavaScript and Java Permissions 5 Click OK to close the window. Figure 183 Security Settings - Java JAVA (Sun) 1 From Internet Explorer, click Tools, Internet Options and then the Advanced tab. 2 Make sure that Use Java 2 for
Appendix B Pop-up Windows, JavaScript and Java Permissions 3 Click OK to close the window. Figure 184 Java (Sun) Mozilla Firefox Mozilla Firefox 2.0 screens are used here. Screens for other versions may vary. You can enable Java, Javascript and pop-ups in one screen. Click Tools, then click Options in the screen that appears.
Appendix B Pop-up Windows, JavaScript and Java Permissions Click Content.to show the screen below. Select the check boxes as shown in the following screen.
Appendix B Pop-up Windows, JavaScript and Java Permissions 384 P-660HW-Tx v3 Series User’s Guide
APPENDIX C IP Addresses and Subnetting This appendix introduces IP addresses and subnet masks. IP addresses identify individual devices on a network. Every networking device (including computers, servers, routers, printers, etc.) needs an IP address to communicate across the network. These networking devices are also known as hosts. Subnet masks determine the maximum number of possible hosts on a network. You can also use subnet masks to divide one network into multiple sub-networks.
Appendix C IP Addresses and Subnetting The following figure shows an example IP address in which the first three octets (192.168.1) are the network number, and the fourth octet (16) is the host ID. Figure 187 Network Number and Host ID How much of the IP address is the network number and how much is the host ID varies according to the subnet mask.
Appendix C IP Addresses and Subnetting By convention, subnet masks always consist of a continuous sequence of ones beginning from the leftmost bit of the mask, followed by a continuous sequence of zeros, for a total number of 32 bits. Subnet masks can be referred to by the size of the network number part (the bits with a “1” value). For example, an “8-bit mask” means that the first 8 bits of the mask are ones and the remaining 24 bits are zeroes.
Appendix C IP Addresses and Subnetting Notation Since the mask is always a continuous number of ones beginning from the left, followed by a continuous number of zeros for the remainder of the 32 bit mask, you can simply specify the number of ones instead of writing the value of each octet. This is usually specified by writing a “/” followed by the number of bits in the mask after the address. For example, 192.1.1.0 /25 is equivalent to saying 192.1.1.0 with subnet mask 255.255.255.128.
Appendix C IP Addresses and Subnetting The following figure shows the company network before subnetting. Figure 188 Subnetting Example: Before Subnetting You can “borrow” one of the host ID bits to divide the network 192.168.1.0 into two separate sub-networks. The subnet mask is now 25 bits (255.255.255.128 or /25). The “borrowed” host ID bit can have a value of either 0 or 1, allowing two subnets; 192.168.1.0 /25 and 192.168.1.128 /25. The following figure shows the company network after subnetting.
Appendix C IP Addresses and Subnetting In a 25-bit subnet the host ID has 7 bits, so each sub-network has a maximum of 27 – 2 or 126 possible hosts (a host ID of all zeroes is the subnet’s address itself, all ones is the subnet’s broadcast address). 192.168.1.0 with mask 255.255.255.128 is subnet A itself, and 192.168.1.127 with mask 255.255.255.128 is its broadcast address. Therefore, the lowest IP address that can be assigned to an actual host for subnet A is 192.168.1.1 and the highest is 192.168.1.126.
Appendix C IP Addresses and Subnetting Table 126 Subnet 3 IP/SUBNET MASK NETWORK NUMBER LAST OCTET BIT VALUE IP Address 192.168.1. 128 IP Address (Binary) 11000000.10101000.00000001. 10000000 Subnet Mask (Binary) 11111111.11111111.11111111. 11000000 Subnet Address: 192.168.1.128 Lowest Host ID: 192.168.1.129 Broadcast Address: 192.168.1.191 Highest Host ID: 192.168.1.190 Table 127 Subnet 4 IP/SUBNET MASK NETWORK NUMBER LAST OCTET BIT VALUE IP Address 192.168.1.
Appendix C IP Addresses and Subnetting Subnet Planning The following table is a summary for subnet planning on a network with a 24-bit network number. Table 129 24-bit Network Number Subnet Planning NO. “BORROWED” HOST BITS SUBNET MASK NO. SUBNETS NO. HOSTS PER SUBNET 1 255.255.255.128 (/25) 2 126 2 255.255.255.192 (/26) 4 62 3 255.255.255.224 (/27) 8 30 4 255.255.255.240 (/28) 16 14 5 255.255.255.248 (/29) 32 6 6 255.255.255.252 (/30) 64 2 7 255.255.255.
Appendix C IP Addresses and Subnetting addresses, follow their instructions in selecting the IP addresses and the subnet mask. If the ISP did not explicitly give you an IP network number, then most likely you have a single user account and the ISP will assign you a dynamic IP address when the connection is established. If this is the case, it is recommended that you select a network number from 192.168.0.0 to 192.168.255.0.
Appendix C IP Addresses and Subnetting 394 P-660HW-Tx v3 Series User’s Guide
APPENDIX D Wireless LANs Wireless LAN Topologies This section discusses ad-hoc and infrastructure wireless LAN topologies. Ad-hoc Wireless LAN Configuration The simplest WLAN configuration is an independent (Ad-hoc) WLAN that connects a set of computers with wireless adapters (A, B, C). Any time two or more wireless adapters are within range of each other, they can set up an independent network, which is commonly referred to as an ad-hoc network or Independent Basic Service Set (IBSS).
Appendix D Wireless LANs with each other. When Intra-BSS is disabled, wireless client A and B can still access the wired network but cannot communicate with each other. Figure 191 Basic Service Set ESS An Extended Service Set (ESS) consists of a series of overlapping BSSs, each containing an access point, with each access point connected together by a wired network. This wired connection between APs is called a Distribution System (DS). This type of wireless LAN topology is called an Infrastructure WLAN.
Appendix D Wireless LANs An ESSID (ESS IDentification) uniquely identifies each ESS. All access points and their associated wireless clients within the same ESS must have the same ESSID in order to communicate. Figure 192 Infrastructure WLAN Channel A channel is the radio frequency(ies) used by wireless devices to transmit and receive data. Channels available depend on your geographical area.
Appendix D Wireless LANs wireless gateway, but out-of-range of each other, so they cannot "hear" each other, that is they do not know if the channel is currently being used. Therefore, they are considered hidden from each other. Figure 193 RTS/CTS When station A sends data to the AP, it might not know that the station B is already using the channel.
Appendix D Wireless LANs Fragmentation Threshold A Fragmentation Threshold is the maximum data fragment size (between 256 and 2432 bytes) that can be sent in the wireless network before the AP will fragment the packet into smaller data frames. A large Fragmentation Threshold is recommended for networks not prone to interference while you should set a smaller threshold for busy networks or networks that are prone to interference.
Appendix D Wireless LANs several intermediate rate steps between the maximum and minimum data rates. The IEEE 802.11g data rate and modulation are as follows: Table 131 IEEE 802.11g DATA RATE (MBPS) MODULATION 1 DBPSK (Differential Binary Phase Shift Keyed) 2 DQPSK (Differential Quadrature Phase Shift Keying) 5.
Appendix D Wireless LANs IEEE 802.1x In June 2001, the IEEE 802.1x standard was designed to extend the features of IEEE 802.11 to support extended authentication as well as providing additional accounting and control features. It is supported by Windows XP and a number of network devices. Some advantages of IEEE 802.1x are: • User based identification that allows for roaming.
Appendix D Wireless LANs • Access-Challenge Sent by a RADIUS server requesting more information in order to allow access. The access point sends a proper response from the user and then sends another Access-Request message. The following types of RADIUS messages are exchanged between the access point and the RADIUS server for user accounting: • Accounting-Request Sent by the access point requesting accounting.
Appendix D Wireless LANs However, MD5 authentication has some weaknesses. Since the authentication server needs to get the plaintext passwords, the passwords must be stored. Thus someone other than the authentication server may access the password file. In addition, it is possible to impersonate an authentication server as MD5 authentication method does not perform mutual authentication. Finally, MD5 authentication method does not support data encryption with dynamic session key.
Appendix D Wireless LANs Dynamic WEP Key Exchange The AP maps a unique key that is generated with the RADIUS server. This key expires when the wireless connection times out, disconnects or reauthentication times out. A new WEP key is generated each time reauthentication is performed. If this feature is enabled, it is not necessary to configure a default encryption key in the wireless security configuration screen.
Appendix D Wireless LANs If the AP or the wireless clients do not support WPA2, just use WPA or WPA-PSK depending on whether you have an external RADIUS server or not. Select WEP only when the AP and/or wireless clients do not support WPA or WPA2. WEP is less secure than WPA or WPA2. Encryption WPA improves data encryption by using Temporal Key Integrity Protocol (TKIP), Message Integrity Check (MIC) and IEEE 802.1x.
Appendix D Wireless LANs keys. This prevent all wireless devices sharing the same encryption keys. (a weakness of WEP) User Authentication WPA and WPA2 apply IEEE 802.1x and Extensible Authentication Protocol (EAP) to authenticate wireless clients using an external RADIUS database. WPA2 reduces the number of key exchange messages from six to four (CCMP 4-way handshake) and shortens the time required to connect to a network.
Appendix D Wireless LANs 4 The RADIUS server distributes the PMK to the AP. The AP then sets up a key hierarchy and management system, using the PMK to dynamically generate unique data encryption keys. The keys are used to encrypt every data packet that is wirelessly communicated between the AP and the wireless clients. Figure 194 WPA(2) with RADIUS Application Example WPA(2)-PSK Application Example A WPA(2)-PSK application looks as follows.
Appendix D Wireless LANs 4 The AP and wireless clients use the TKIP or AES encryption process, the PMK and information exchanged in a handshake to create temporal encryption keys. They use these keys to encrypt data exchanged between them. Figure 195 WPA(2)-PSK Authentication Security Parameters Summary Refer to this table to see what other security parameters you should configure for each authentication method or key management protocol type.
Appendix D Wireless LANs Antenna Overview An antenna couples RF signals onto air. A transmitter within a wireless device sends an RF signal to the antenna, which propagates the signal through the air. The antenna also operates in reverse by capturing RF signals from the air. Positioning the antennas properly increases the range and coverage area of a wireless LAN. Antenna Characteristics Frequency An antenna in the frequency of 2.4GHz (IEEE 802.11b and IEEE 802.11g) or 5GHz (IEEE 802.
Appendix D Wireless LANs • Omni-directional antennas send the RF signal out in all directions on a horizontal plane. The coverage area is torus-shaped (like a donut) which makes these antennas ideal for a room environment. With a wide coverage area, it is possible to make circular overlapping coverage areas with multiple access points. • Directional antennas concentrate the RF signal in a beam, like a flashlight does with the light from its bulb.
APPENDIX E Services The following table lists some commonly-used services and their associated protocols and port numbers. • Name: This is a short, descriptive name for the service. You can use this one or create a different one, if you like. • Protocol: This is the type of IP protocol used by the service. If this is TCP/ UDP, then the service uses the same port number with TCP and UDP. If this is USER-DEFINED, the Port(s) is the IP protocol number, not the port number.
Appendix E Services Table 135 Examples of Services 412 NAME PROTOCOL PORT(S) DESCRIPTION AH (IPSEC_TUNNEL) User-Defined 51 The IPSEC AH (Authentication Header) tunneling protocol uses this service. AIM TCP 5190 AOL’s Internet Messenger service. AUTH TCP 113 Authentication protocol used by some servers. BGP TCP 179 Border Gateway Protocol. BOOTP_CLIENT UDP 68 DHCP Client. BOOTP_SERVER UDP 67 DHCP Server.
Appendix E Services Table 135 Examples of Services (continued) NAME PROTOCOL PORT(S) DESCRIPTION MSN Messenger TCP 1863 Microsoft Networks’ messenger service uses this protocol. NetBIOS TCP/UDP 137 TCP/UDP 138 The Network Basic Input/Output System is used for communication between computers in a LAN. TCP/UDP 139 TCP/UDP 445 NEW-ICQ TCP 5190 An Internet chat program. NEWS TCP 144 A protocol for news groups.
Appendix E Services Table 135 Examples of Services (continued) 414 NAME PROTOCOL PORT(S) DESCRIPTION SFTP TCP 115 The Simple File Transfer Protocol is an old way of transferring files between computers. SMTP TCP 25 Simple Mail Transfer Protocol is the message-exchange standard for the Internet. SMTP enables you to move messages from one e-mail server to another. SMTPS TCP 465 This is a more secure version of SMTP that runs over SSL. SNMP TCP/UDP 161 Simple Network Management Program.
APPENDIX F Legal Information Copyright Copyright © 2010 by ZyXEL Communications Corporation. The contents of this publication may not be reproduced in any part or as a whole, transcribed, stored in a retrieval system, translated into any language, or transmitted in any form or by any means, electronic, mechanical, magnetic, optical, chemical, photocopying, manual, or otherwise, without the prior written permission of ZyXEL Communications Corporation. Published by ZyXEL Communications Corporation.
Appendix F Legal Information • This device must accept any interference received, including interference that may cause undesired operations. This device has been tested and found to comply with the limits for a Class B digital device pursuant to Part 15 of the FCC Rules. These limits are designed to provide reasonable protection against harmful interference in a residential installation.
Appendix F Legal Information 本機限在不干擾合法電臺與不受被干擾保障條件下於室內使用。 減少電磁波影響,請妥適使用。 Notices Changes or modifications not expressly approved by the party responsible for compliance could void the user's authority to operate the equipment. This device has been designed for the WLAN 2.4 GHz network throughout the EC region and Switzerland, with restrictions in France. Ce produit est conçu pour les bandes de fréquences 2,4 GHz et/ou 5 GHz conformément à la législation Européenne.
Appendix F Legal Information Note Repair or replacement, as provided under this warranty, is the exclusive remedy of the purchaser. This warranty is in lieu of all other warranties, express or implied, including any implied warranty of merchantability or fitness for a particular use or purpose. ZyXEL shall in no event be held liable for indirect or consequential damages of any kind to the purchaser.
Index Index Numerics alerts 301 firewalls 200 802.1Q/1P 243 activation 249 example 245 group settings 250 management VLAN 249 port settings 252 priority 243, 252 PVC 244 PVID 252 tagging frames 244, 251 algorithm, certificates 234 MD5 fingerprint 234 SHA1 fingerprint 234 A activation 802.
Index logs 303 packet filtering 222, 225 port forwarding 175 reset 328 restoring 317, 326 static route 241 WAN 101 wireless LAN 139 wizard 86 C CA 229, 403 algorithm 234 trusted 230, 233 CBR 105, 112, 117 Certificate Authority See CA.
Index DSL connections, status 332 dynamic DNS 269 activation 270 wildcard 269 activation 271 Dynamic Host Configuration Protocol, see DHCP dynamic WEP key exchange 404 DYNDNS wildcard 269 activation 271 E EAP Authentication 402 e-mail logs 304 encapsulation 99, 102, 109 ENET ENCAP 113 PPPoA 114 PPPoE 113 RFC 1483 114 encryption 140, 160, 405 WEP 142 key 142 WPA 144 authentication 145 reauthentication 143, 145 WPA-PSK 143 pre-shared key 143 ENET ENCAP 102, 109, 113 ESS 396 exporting trusted CA 234 Extended
Index limitations 317 QoS 264 restoring configuration 317, 318 upgrading firmware 318, 319 ping 329 private 131 IP alias 127 configuration 128 NAT applications 184 IP precedence 266 G generic filters 223, 226 activation 224 length 225 logs 226 mask 225 offset 225 H half-open sessions 204 hidden node 397 I IANA 393 Internet Assigned Numbers Authority see IANA L LAN 119 Any IP 123, 133 example 133 client list 126 DHCP 120, 125, 130 DNS 120, 125, 130 IGMP 120, 133 IP address 120, 121, 131 IP alias 127 con
Index packet filtering 226 port forwarding 172, 174 activation 177 configuration 175 example 175 rules 177 remote management 275 SIP ALG 181 activation 181 SUA 172, 173 M MAC address 126, 148 filter 138, 140, 147, 159 MAC address filter activation 148 management VLAN 249 mapping address 178 rules 179 types 179, 180, 184 Maximum Burst Size, see MBS NetBIOS 123 maximum incomplete 204 Network Address Translation see NAT Maximum Transmission Unit, see MTU Network Address Translation, see NAT MBS 105, 112
Index port forwarding 172, 174 activation 177 configuration 175 example 175 rules 177 PPPoA 102, 109, 114 PPPoE 102, 109, 113 passthrough 105 routing policy 262 SIP 264 Quality of Service, see QoS R pre-shared key 143 RADIUS 401 message types 401 messages 401 shared secret key 402 private IP address 131 RADIUS server 160 probing, firewalls 190 reauthentication, WPA 143, 145 product registration 418 registration product 418 preamble 146, 158 preamble mode 399 protocol filters 221, 226 activation
Index firewalls 199 logs 304 wireless LAN 155 subnet mask 120, 131, 386 subnetting 388 Sustain Cell Rate, see SCR SCR 105, 112, 116 syntax conventions 5 security network 206 wireless LAN 140, 158 system 296 backing up configuration 321 backup configuration 320 firmware 316, 323 upgrading 318 version 36 LED 26 name 297 passwords 29, 30 administrator 297 users 297 reset 27 restoring configuration 317 status 32, 35 firewalls 37 LAN 36 WAN 36 wireless LAN 37 time 298 Service Set IDentifier, see SSID Sessi
Index algorithm 234 exporting 234 importing 231 MD5 fingerprint 234 PEM 234 SHA1 fingerprint 234 U UBR 105, 112, 117 unicast 100 Universal Plug and Play, see UPnP upgrading firmware 318, 323 UPnP 281 activation 283 cautions 282 example 284 installation 284 NAT traversal 281 URL 211 V VBR 117 VBR-nRT 105, 112, 117 VBR-RT 105, 112, 117 VCI 102, 109, 114 WAN 99 ATM QoS 105, 112, 117 DNS 103 encapsulation 99, 102, 109 IGMP 100 IP address 100, 103, 109, 115 mode 102, 109 modulation 102 MTU 105, 112 multicast
Index limitations 161 MAC address filter 138, 140, 147, 148, 159 MBSSID 162 preamble 146, 158 RADIUS server 160 RTS/CTS threshold 146, 158 scheduling 155 security 158 SSID 138, 140, 150, 159 activation 149 status 37 WDS 153, 163 compatibility 153 example 163 WEP 142, 161 key 142 wizard 92 WPA 144, 161 authentication 145 reauthentication 143, 145 WPA-PSK 143, 161 pre-shared key 143 WPS 151, 163, 166 activation 151 adding stations 153 example 168 limitations 169 PIN 151, 153, 164 push button 27, 153, 164 stat
Index 428 P-660HW-Tx v3 Series User’s Guide