
Technical data


Dial-Up Networking and RAS Administration
Dialogic
®
Diva
®
System Release 8.5.6WIN Reference Guide page 47
• Control access through Remote Access Policy
Depending on the Remote Access Policy, dial-in permission is granted or denied to the user. For further
information on Remote Access Policies, see your Windows
®
documentation.
The following callback options can be configured:
• No Callback
The client establishes the connection to the server and maintains the connection. The user of the RAS
client assumes all charges.
• Set by Caller (Routing and Remote Access Service only)
The client establishes the connection to the server, sends its current call number and then breaks the
connection. The server calls the client back at the number given and therefore assumes the charges for
the call. The client’s call can therefore be made from any site.
• Always Callback to
The client establishes the connection to the server, thereby indicating that a connection is required, and
then breaks the connection. The server calls the client back at the preassigned call number. This provides
that the client can call from one telephone terminal only. This provides that no other partner can call from
another terminal, because this call number cannot be manipulated.
To close the dialog box, click OK.
Note: Only the users that are set up on the server are shown in the "Users" list. For information on how to
configure authorizations for remote access for Windows Server
®
2003 and Windows Server
®
2008 domains, see
your Windows
®
documentation.
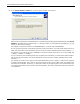
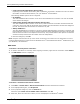
RAS status
To monitor a currently active connection:
1. To monitor the status of a currently active outgoing connection, right-click the connection. Select Status.
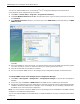
2. The RAS Status monitor is displayed:
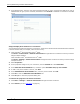
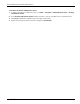
To monitor a connection each time it is active:
1. Click Start > Control Panel > Network Connections and select the desired connection.
2. In the displayed dialog box, click Properties.
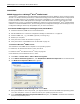
3. In the properties dialog box, click the General tab:
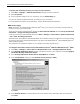
Check the option Show icon in taskbar when connected. Click OK.
4. Each time, when the connection is active, an icon is displayed in the Windows
®
taskbar.