
Neoview Database Administrator's Guide (R2.2)
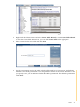
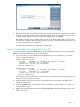

13. Select Finish when you are ready.
DB Admin prompts you to confirm that you want to create this table. When you click Yes,
it attempts to create the table and either displays an error or indicates that the creation was
successful and displays its information.
14. When the wizard completes successfully, grant access privileges to the table. See “Granting
and Revoking Access (Privileges) to a Table” (page 47)
For additional information, see DB Admin online help.
To create synonyms for tables, see “Creating Synonyms” (page 72).
Creating Tables From Existing Tables
Once tables exist in your system, you can use the Create Table Using Wizard to quickly create
similar tables.
1. Start DB Admin and log on using any user ID allowed to create tables. The DBA role is
intended for this task.
2. Click the Database tab, then select the schema, owned by your user ID role, in which you
want the table created.
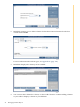
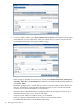
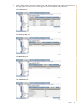
3. Right-click on the table you want to use as the basis for the new table and select Create Table
Using. Or, you can right-click the Schema name and select Create Table Using to start the
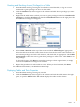
wizard. Navigate to the table that you want to use, select it, and click Next:
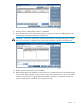
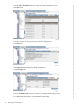
4. Enter a name for the new table and click Next:
44 Managing Database Objects