
Installation guide


Pompeii Oven Instructions
© Forno Bravo, LLC 2007. All Rights Served. Ver. 1.2 10
Getting Started: A Brick Oven
Overview
The Pompeii Oven is comprised of a number of basic
components, which we will define here to give you a better
understanding how you will go about building your oven.
Other resources include:
The Anatomy of a Wood-Fired Oven shows the various
parts of the oven (see Appendix 6).
Our Thermal Mass Primer shows how wood-fired ovens
absorb and hold heat, and cook (see Appendix 5).
1. The Foundation Slab
Your oven enclosure rests on a traditional wire mesh
reinforced 5 1/2 " concrete slab. It can be a stand-alone
slab built specifically to support your oven, or it can be
poured to accommodate other outdoor kitchen items
including shelves, grills and tables. Your outdoor kitchen
can, and probably will, evolve over time. If you are in
areas with deep frost, you will want to ensure that your
slab is properly engineered to remain level during the
winter freeze.
2. The Stand and Insulating Hearth
Your oven dome and cooking surface are set on an
insulating hearth and stand built on your foundation slab.
The insulating hearth is framed and poured directly on
your block stand. The oven cooking floor should be set to
a height where you can easily place and remove food --
typically around 40 inches. The insulating hearth and the
block stand are the same width and depth.
The insulating hearth serves three purposes, providing
your oven with:
• A rigid platform that spans the opening between the
stand's legs above the wood storage area.
• An insulation layer to stop heat from escaping through
the rigid platform and down into the stand legs.
• A smooth surface on which the cooking surface will
rest.
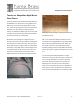
3. The Cooking Surface and Vent Floor
Pizza and bread are baked directly on the oven cooking
surface, while other foods such as vegetables and roasts
are placed in cookware, or cooked on a Tuscan style grill
over wood coals. The oven landing sits just in front of your
oven, under the vent. Additionally, you will want to build an
additional landing area in front of the oven opening to
provide a staging area for food that is being placed inside
or removed from the oven.
The cooking surface should be built using high quality
firebricks, set on their wide side in a basket weave pattern
so that the seams are staggered. This design provides a 2
1/2" thick cooking surface, perfect for a home or garden
oven.
Alternatively, you can purchase a round cooking surface
from Forno Bravo. The advantage to the round cooking
surface is that you can build your oven dome around, not
on, the oven floor, which is a more heat-efficient approach.
The round floor also saves time, and presents fewer
seams that might catch your peels or pans.
The owner or builder can also choose to install a larger
oven landing in front of the oven using such materials as
brick or granite. The cooking surface is centered left and
right on the hearth slab, with the oven dome built either on
the cooking surface, or around it. Placement of the front
edge of the oven floor depends on the depth of the oven
landing, where the front of the oven butts up to the landing
material.
4. The Oven Dome
The oven chamber is made as a circular parabolic dome
built from firebrick. The dome shape is designed to
efficiently absorb heat from a wood fire, and to evenly
reflect the heat of a live fire to the cooking surface – where