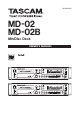
D01082620B MD-02 MD-02B MiniDisc Deck OWNER'S MANUAL
IMPORTANT SAFETY PRECAUTIONS CAUTION: TO REDUCE THE RISK OF ELECTRIC SHOCK, DO NOT REMOVE COVER (OR BACK). NO USER-SERVICEABLE PARTS INSIDE. REFER SERVICING TO QUALIFIED SERVICE PERSONNEL. The lightning flash with arrowhead symbol, within equilateral triangle, is intended to alert the user to the presence of uninsulated “dangerous voltage” within the product’s enclosure that may be of sufficient magnitude to constitute a risk of electric shock to persons.
IMPORTANT SAFETY INSTRUCTIONS 1 Read these instructions. •• Do not expose this apparatus to drips or splashes. 2 Keep these instructions. •• Do not place any objects filled with liquids, such as vases, on the apparatus. 3 Heed all warnings. 4 Follow all instructions. 5 Do not use this apparatus near water. 6 Clean only with dry cloth. •• Do not install this apparatus in a confined space such as a book case or similar unit.
Safety Information CAUTIONS ABOUT BATTERIES This product uses batteries. Misuse of batteries could cause a leak, rupture or other trouble. Always abide by the following precautions when using batteries. •• Never recharge non-rechargeable batteries. The batteries could rupture or leak, causing fire or injury. •• When installing batteries, pay attention to the polarity indications (plus/minus (+/–) orientation), and install them correctly in the battery compartment as indicated.
Contents 1 − Introduction.......................................... 6 Front panel....................................................... 8 Rear panel...................................................... 10 Display............................................................ 11 Remote control unit...................................... 12 Selecting the input signal ............................ 22 Monitoring the input signal . ....................... 22 Adjusting the recording level ......................
1 − Introduction Thank you very much for purchasing a TASCAM MD-02/MD-02B MiniDisc deck. Please read this manual thoroughly before using the unit so that you understand correct operating procedures and can use its functions fully. We hope that you enjoy using this unit for many years. •• 2U rack-mount size Please keep this manual so that you can read it at any time. A digital copy of this manual can also be downloaded from our website (http://www.tascam.
1 − Introduction Intellectual property rights Cleaning the unit •• TASCAM is a registered trademark of TEAC Wipe the unit with a soft dry cloth to clean it. Do not use any benzine, paint thinner, alcohol or other chemical agents. Doing so could damage the surface of the unit or cause fading. Corporation. •• US and foreign patents licensed from Dolby Laboratories Licensing Corporation.
2 − Names and Functions of Parts Front panel POWER switch 11 Turns the power ON and OFF. CAUTION Minimize the volume of connected devices before turning the power ON. Failure to do so could cause sudden loud noises, resulting in hearing damage, for example. MD slot 22 Insert MD discs for recording or playback here. Insert in the direction of the arrow with the label side up. MENU key 33 Press to turn the menu mode ON and OFF (see “ 4 – Menu Operation” on page 16). EJECT key 44 Press to eject MD discs.
2 − Names and Functions of Parts CAUTION Before connecting headphones, minimize the volume with the PHONES level knob. Failure to do so could cause sudden loud noises, resulting in hearing damage, for example. r PHONES jack This is a standard headphones jack for connecting stereo headphones. Use an adapter to connect headphones that have mini-plug jacks. t MULTI JOG dial (ENTER key) Turn to use as the MULTI JOG dial and push to use as an ENTER key.
2 − Names and Functions of Parts Rear panel MD-02 MD-02B h ANALOG IN L/R (UNBALANCED) These analog line input jacks (RCA pin jacks) have a nominal input level of –10 dBV. j ANALOG OUT L/R (UNBALANCED) These analog line output jacks (RCA pin jacks) have a nominal output level of –10 dBV. These output the selected input signal during recording, when in recording standby and when monitoring. k DIGITAL IN (COAXIAL) This coaxial digital input jack conforms to IEC60958-3 (S/PDIF).
2 − Names and Functions of Parts Display TOC 11 This appears when the most recent U-TOC information has not yet been recorded to the disc and blinks during U-TOC recording. w ANALOG This indicator appears when the input source is set to UNBALANCED (analog), and blinks when set to BALANCED (analog, MD-02B only) Track number display area 22 The track number that is selected or being played is shown. e SINGLE This indicator appears when in single repeat mode.
2 − Names and Functions of Parts Remote control unit REPEAT 55 Press to change the repeat playback mode (see “Repeat playback” on page 19). The repeat mode setting is retained even when the power is turned OFF. NOTE •• If the unit is in single repeat mode when the STOP key is pressed, the mode changes to all repeat. •• If the unit is in single repeat mode when the power is turned OFF, the mode changes to all repeat when the power is turned ON again.
2 − Names and Functions of Parts In title input mode, press to cancel the input of characters and exit title input mode (see “Title input method” on page 26). e PLAY When stopped or in playback standby, press to start playback. When in recording standby, press to start recording. r EJECT Press to eject the MD disc. t ESC/CLR In menu mode, press this key to return to the previous menu level (see “4–Menu Operation” on page 16). When inputting a track number, press this key to clear the track number.
3 − Preparations When connecting external equipment, please read their operation manuals beforehand and connect them correctly. Turn the power on last.
3 − Preparations Preparing the remote control Remote sensor Installing the batteries 15° 15° Operation distance Directly in front: Within 7 meters 1. Open the cover on the back. 2. Paying attention to the +/– orientation, insert two AAA batteries. 3. Close the cover. When to change the batteries If the distance that operation is effective becomes shorter or pressing the keys does not have any effect, replace both batteries with new ones at the same time.
4 − Menu Operation Various settings for this unit can be made by using menu items shown on the display. In this section, we explain the unit’s menu structure and basic menu operations.
4 − Menu Operation NOTE Press the MENU key when a selectable menu item is shown to return to the information display. 2. Use the MULTI JOG dial on the main unit or the +/– keys on the remote control to select the desired menu item. 4. Use the MULTI JOG dial on the main unit or the +/– keys on the remote control to set the value as desired. 5. Use the MULTI JOG dial on the main unit or the ENTER key on the remote control to confirm the setting. The unit returns to information display mode.
5 − Playback Playable MDs ªª Pausing playback This unit can play audio MDs that have been recorded in ST (stereo), LP2, LP4 or MONO mode. Playback modes This unit has three playback modes. The currently selected playback mode is indicated on the display. Ordinary playback (Continue) mode: no indicator Program playback mode: “PROGRAM” indicator Press the READY key on the main unit or the remote control. “π” lights on the display and the MD begins playback standby.
5 − Playback Examples: 1. Connect the deck in advance so that it receives power from an external timer’s power output. Track 9: Press 9 2. Insert an MD for playback. Track 12: Press 1 followed by 2 Track 103: Press 1 followed by 0 and then 3 After selecting a track by number keys, press the PLAY key on the remote control to start playing the selected track. You can also press the READY key on the remote control to start playback standby at the beginning of the selected track.
5 − Playback Program data retention NOTE •• If you press the STOP key before pressing the PLAY key, the program data is erased. •• Program data is retained after program playback com- •• If the total playback time of the programmed tracks exceeds 150 minutes 00 seconds, "---m--s" is shown.
5 − Playback •• For time display when recording and when in recording standby, see “Checking the MD’s remaining time” on page 25. •• The time display setting is retained even when the power is turned OFF. ªª Changing the character display Press the DISPLAY key on the main unit or the remote control when stopped to show the current disc title on the display. Press during playback or in playback standby to show the current track title.
6 − Recording Selecting the input signal In this chapter, we explain procedures related to recording, including setting the record mode, selecting input sources, adjusting recording levels while monitoring the input signal and actually recording. Use the INPUT SELECT key on the main unit or the INPUT SEL key on the remote control to cycle through the input The following procedures assume that the unit’s power is ON and a recordable MD is loaded.
6 − Recording Adjusting the recording level Precautions when recording Adjust the recording level while monitoring the input signal or watching the meters. If “W_Protected!” is shown, an MD that cannot be recorded because the write-protection tab is engaged or an MD that can only be played back might be loaded. In the former case, slide the write-protection tab to close the opening, enabling the disc for recording.
6 − Recording 5. Press the MULTI JOG dial on the main unit or the ENTER key on the remote control. ªª When "Level" is selected If the input signal is analog and its level becomes less than –41 dB for two seconds or more, a new track is created (track number incremented) when an input level of –41 dB is detected again. If the input signal is digital (COAXIAL or OPTICAL), and the input source is not a CD or MD, new tracks are created in the same manner as for analog input, but the detection level is –61 dB.
6 − Recording Sync recording In sync recording, the level of the input signal is detected and recording starts and pauses automatically. When the sync recording function is ON and the unit is in recording standby, recording automatically starts when an analog input exceeding –41 dB or a digital input exceeding –61 dB is detected. When recording, if the analog input becomes less than –41 dB or the digital input becomes less than –61 dB for 8 seconds, the unit returns to recording standby.
7 − MD Editing Editing operations allow recorded tracks to be titled, deleted, moved, divided or combined, for example. Tracks can also be put into groups. NOTE Editing is only possible when the playback mode is set to “Continue” and group playback mode is OFF. Editing operations Use the editing (EDIT) menu for all editing functions. The procedures after selecting an editing menu item depend on that item.
7 − MD Editing 4. Press the MULTI JOG dial on the main unit or the ENTER key on the remote control. The current disc title is shown in the character display area, and title editing mode is activated (the cursor blinks). NOTE If there is no title, nothing is shown (except for the blinking cursor). 5. Follow the guidelines in the “Title input method” section below to add a title, and then press the MENU key on the main unit or the remote control to confirm it. 6. Eject the MD.
7 − MD Editing 2. Press the EDIT key on the main unit or the remote control. 3. Use the MULTI JOG dial on the main unit or the +/– keys on the remote control to select “DIVIDE?” 4. Start playing the track before the point when you want to divide it and, when you reach that point, press the MULTI JOG dial on the main unit or the ENTER key on the remote control.
7 − MD Editing 2. Press the EDIT key on the main unit or the remote control. Select the end track (last track in the group) when this is shown. 3. Use the MULTI JOG dial on the main unit or the +/– keys on the remote control to select “MOVE?” 6. Use the MULTI JOG dial on the main unit or the +/– keys on the remote control to select the end track. 4. Press the MULTI JOG dial on the main unit or the ENTER key on the remote control. “Move xxx > ###” is shown on the display.
7 − MD Editing 4. Use the MULTI JOG dial on the main unit or the +/– keys on the remote control to select the group number to be deleted. In addition to the currently existing groups, you can also select “ALL” to delete all groups. 5. Press the MULTI JOG dial on the main unit or the ENTER key on the remote control. “Sure?” appears. 6. Press the MULTI JOG dial on the main unit or the ENTER key on the remote control to delete the selected group. “Complete” appears on the display when the operation finishes.
8 − Using a computer keyboard with the deck Connect an IBM PC-compatible PS/2 interface keyboard to the front panel to allow keyboard control of the deck and more efficient input of titles. Setting the keyboard type Set the keyboard type when you connect a keyboard. 1. Press the MENU key on the main unit or the remote control. 2. Use the MULTI JOG dial on the main unit or the +/– keys on the remote control to select “KEYBOARD?” 3.
9 − Checking Service Data and Restoring Default Settings Checking service data Use the following menu items to check service data. 1. Press the MENU key on the main unit or the remote control. 2. Use the MULTI JOG dial on the main unit or the +/keys on the remote control to select “PLAY TIME?” or “REC_TIME?”. 3. Press the MULTI JOG dial on the main unit or the ENTER key on the remote control.
10 − MD System Limitations During use of this deck, some of the following issues might arise. Please be aware that these are due to MD system limitations and are not malfunctions. ªª When searching, the sound breaks up. ªª “Track Full!” is displayed even when recordable time remains. ªª Track numbers are not properly added. Regardless of the time, “Track Full!” is displayed when the maximum number of tracks has been reached. The maximum number of tracks that can be recorded is 255.
11 − Messages & Troubleshooting Operation messages Depending on the operation of the unit, the following messages might be shown in the main display area. Messages Meaning/response Blank Disc A recordable MD that has nothing recorded is loaded. UnknownDisc! There is a problem with the disc. Try a different disc. Complete Editing has been finished correctly. TOC Reading TOC information is being read. UTOC Writing TOC information is being written. Now Editing Editing is being executed.
11 − Messages & Troubleshooting Troubleshooting ªª The power does not come on. Is the power plug completely connected? ªª “Disc Error!” or “Mecha Error!” appears on the display. The disc might be dirty. Change the disc. ªª "System Err!" appears on the screen. The MD deck could be malfunctioning. Please contact a TEAC service center. ªª The unit cannot play a disc. Is there condensation? If there is condensation, eject the disc, turn the power OFF and wait several hours. ªª There is no sound.
12 − Specifications ªª MD deck Digital input (OPTICAL) Connector Digital optical, rectangular (JEITA RC-5720C) Model MiniDisc deck Type of disc MiniDisc Recording modes STEREO, MONO, LP2, LP4 Recording format overwrite Magnetic field modulation Digital output (COAXIAL) Connector RCA Recording time 74 minutes (STEREO), 148 minutes (MONO), 148 minutes (LP2), 296 minutes (LP4) (using a 74-minute disc) Format Sampling frequency 44.
12 − Specifications Dimensions (WHD) 482.6 x 94 x 308.7 mm 19 x 3.7 x 12.15 in. Weight 4.4 kg/9.7 lb (MD-02) 4.5 kg/9.92 lb (MD-02B) Operation temperature 5–35º C (41–95º F) Inclination of installation 5° or less 284.6 mm 6.4 mm Dimensions 18 mm 482.6 mm 94 mm 88 mm 76.2 mm 465.6 mm NOTE •• Specifications and external appearance are subject to change without notice for product improvement.
Notes 38 TASCAM MD-02/MD-02B
Notes TASCAM MD-02/MD-02B 39
MD-02 MD-02B TEAC CORPORATION Phone: +81-42-356-9143 1-47 Ochiai, Tama-shi, Tokyo 206-8530, Japan TEAC AMERICA, INC. www.tascam.jp www.tascam.com Phone: +1-323-726-0303 7733 Telegraph Road, Montebello, California 90640 USA TEAC CANADA LTD. www.tascam.com Phone: +1905-890-8008 Facsimile: +1905-890-9888 5939 Wallace Street, Mississauga, Ontario L4Z 1Z8, Canada TEAC MEXICO, S.A. de C.V. www.teacmexico.